Overview
“Advanced Search adapter for Solr” is an Omeka S module that provides an advanced search adapter for Apache Solr. This enables you to leverage the full power of a search engine within Omeka. It provides features such as relevance-based (score) search, instant search, facets, autocomplete, and suggestions for both general users and administrators.
https://github.com/Daniel-KM/Omeka-S-module-SearchSolr
Setting Up Apache Solr
!
Apache Solr can be installed on a server different from the one where Omeka S is installed.
Set up Apache Solr in an environment where Java can be installed. For Ubuntu, the following site was helpful.
https://tecadmin.net/how-to-install-apache-solr-on-ubuntu-22-04/
You can start Apache Solr with commands like the following.
Also, create a core called mycol1.
Installing the Module
!
From here, work on the server where Omeka S is installed.
Download and install the module from the following page.
https://github.com/Daniel-KM/Omeka-S-module-SearchSolr/releases
During installation, you may see an alert indicating that AdvancedSearch is required, as shown below.
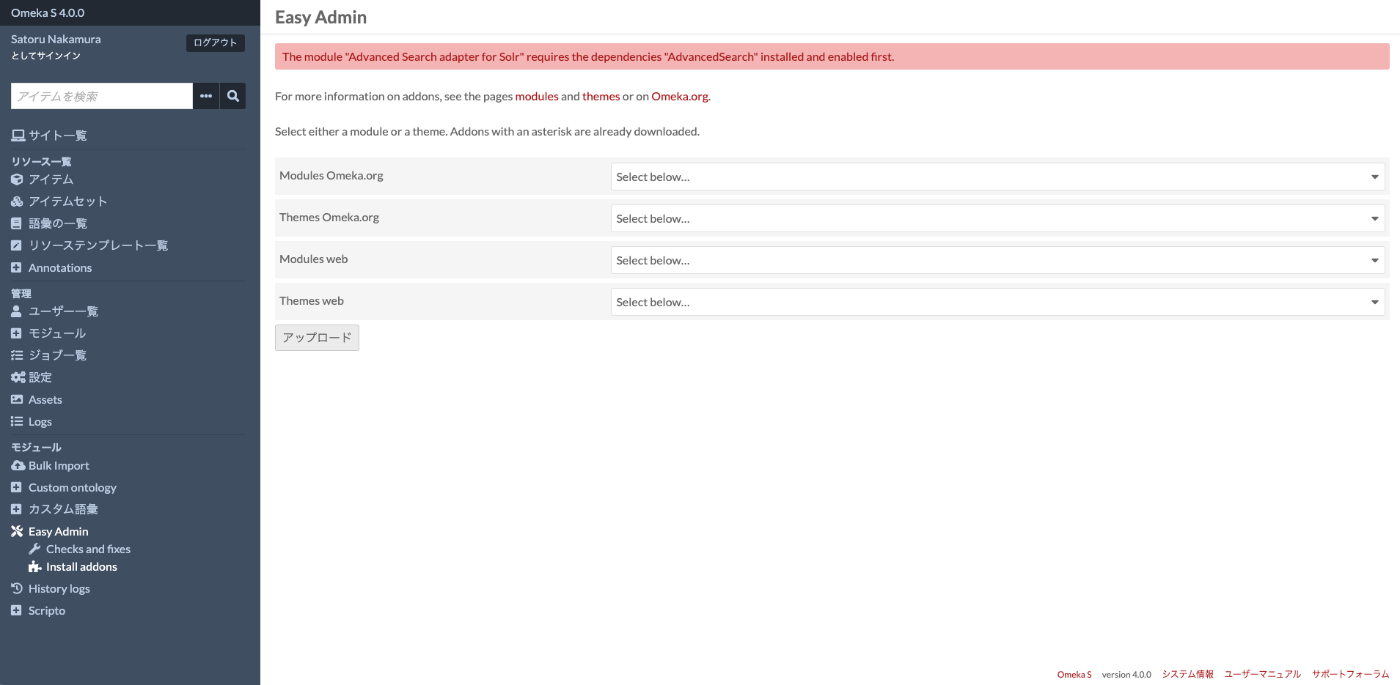
In that case, install and enable the following module first, then try installing Advanced Search adapter for Solr again.
https://omeka.org/s/modules/AdvancedSearch/
Connecting to Apache Solr
From the left side of the admin panel, navigate to Modules > Search manager to access the following screen.
</admin/search-manager>
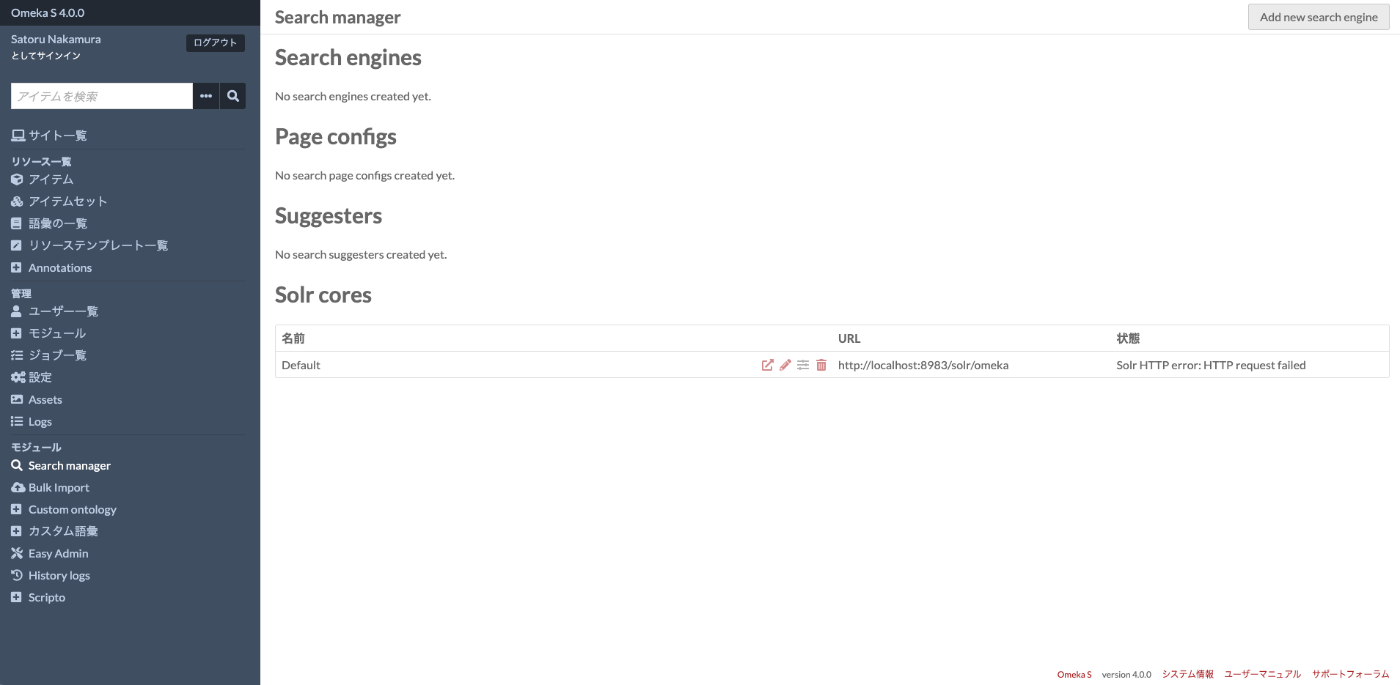
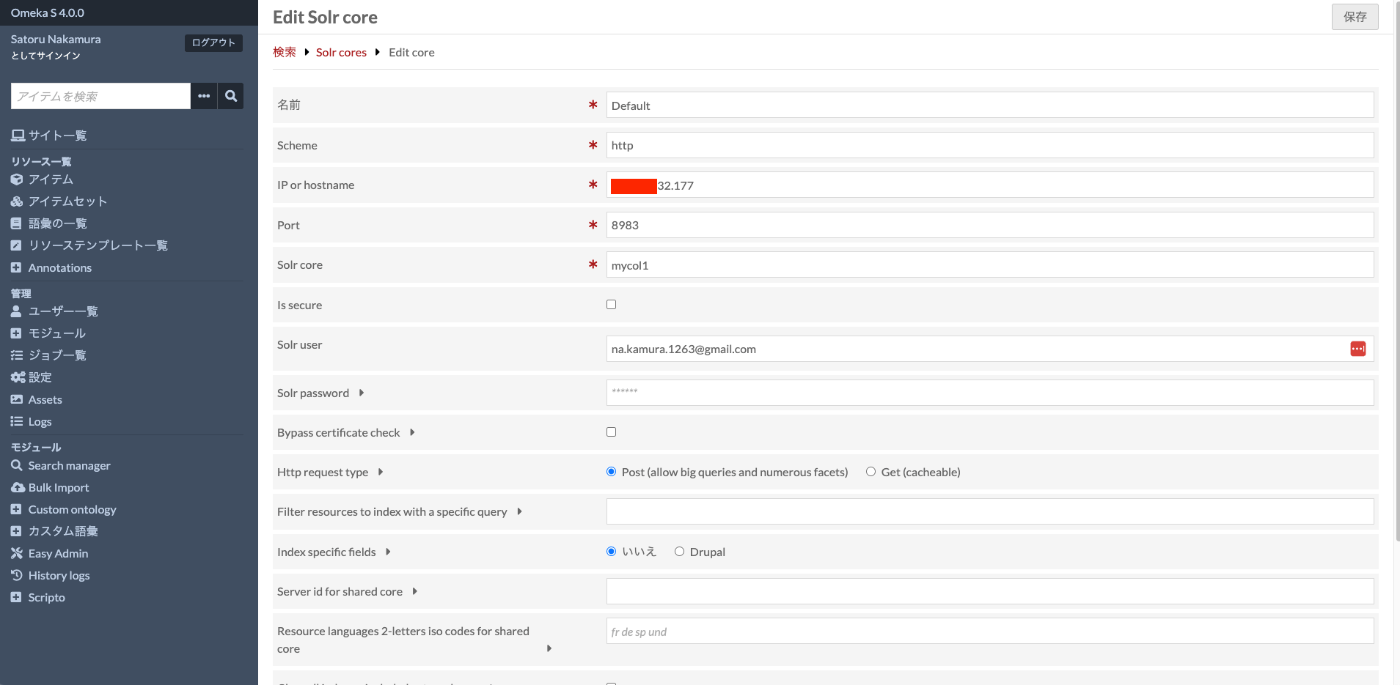
Click the pencil button for the default core in “Solr cores” to access the following page. On this page, enter the IP address or hostname of the server where Apache Solr is installed in the “IP or hostname” form. Also enter the core you created earlier (here, mycol1) in “Solr core”.
</admin/search-manager/solr/core/1/edit>
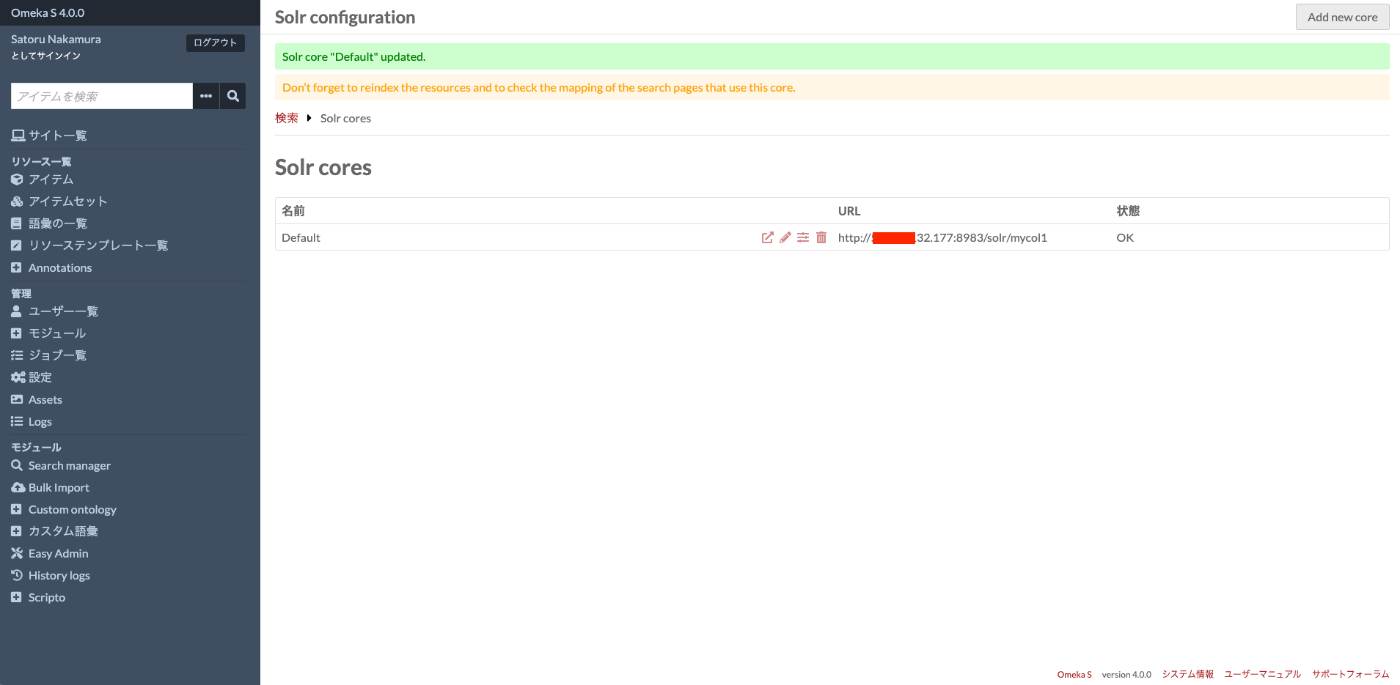
If configured correctly, the “Status” will show OK as shown in the following screen. This confirms that Omeka S and Apache Solr are connected.
Creating Indexes and Pages
Here, we will create indexes and pages, and set up the search screen display in Omeka S.
In Search Admin
Access the following screen again.
</admin/search-manager>
Add Search Engine
On the above screen, click the “Add new search engine” button in the upper right. On the following screen, enter an appropriate name and select “Solr” for the “Adapter” field.

Then, on the following screen, click the “Reindex” icon. A reindexing block will appear on the right side of the screen, and click the “Confirm reindex” button.

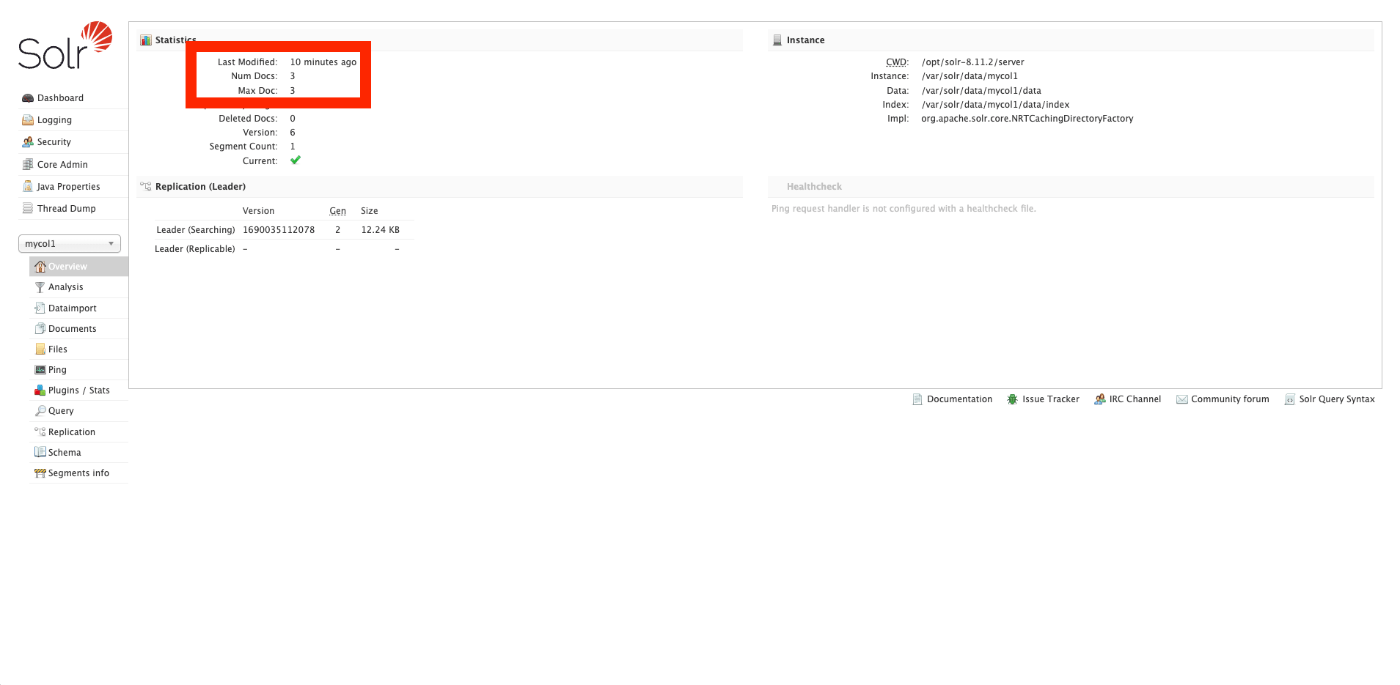
This synchronizes Omeka S with Apache Solr. After reindexing is complete, checking the Apache Solr admin panel shows that (in this case, 3) documents have been registered.
Create a Page
Next, create a page. Access the Search manager admin screen again and click the “Add new page” button in the upper right.
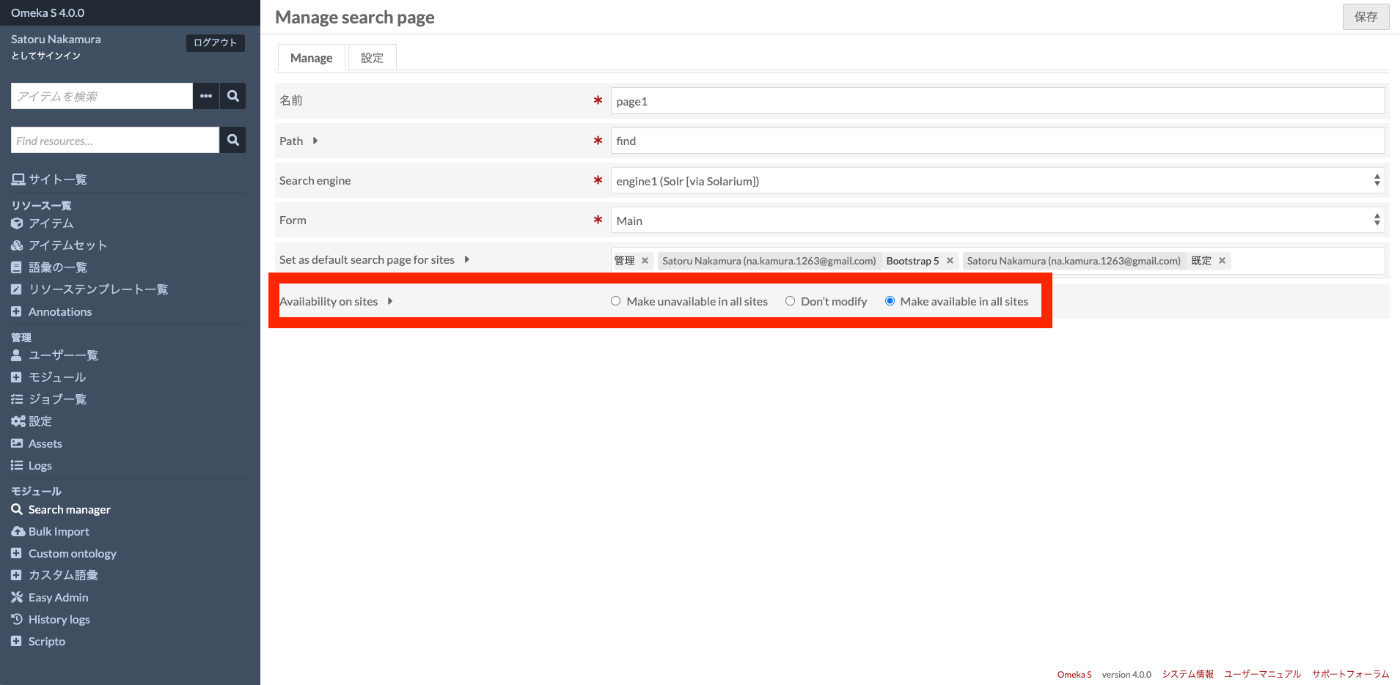
After navigating to the following screen, fill in the required fields. Here is an example:
| Field | Value |
|---|---|
| Name | page1 |
| Path | find |
| Search engine | engine1 (the name of the engine you created earlier) |
| Form | Main |
Also, for “Availability on sites”, select “Make available in all sites” for now.
In Admin or Site Settings
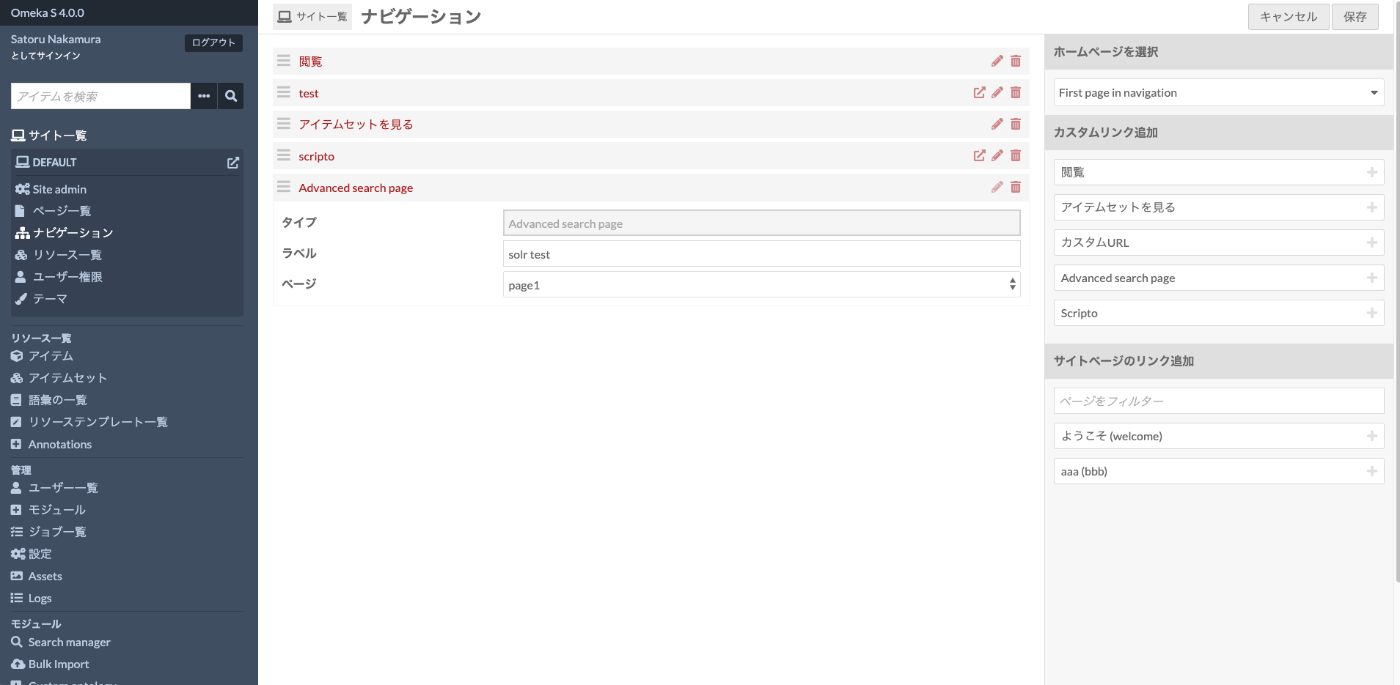
Next, add the created page to the Omeka S site. Select a specific site from the list of created sites and choose “Navigation”. On the following screen, select “Advanced search page” from the “Add custom link” on the right side, and select the name of the page you created (here, page1).
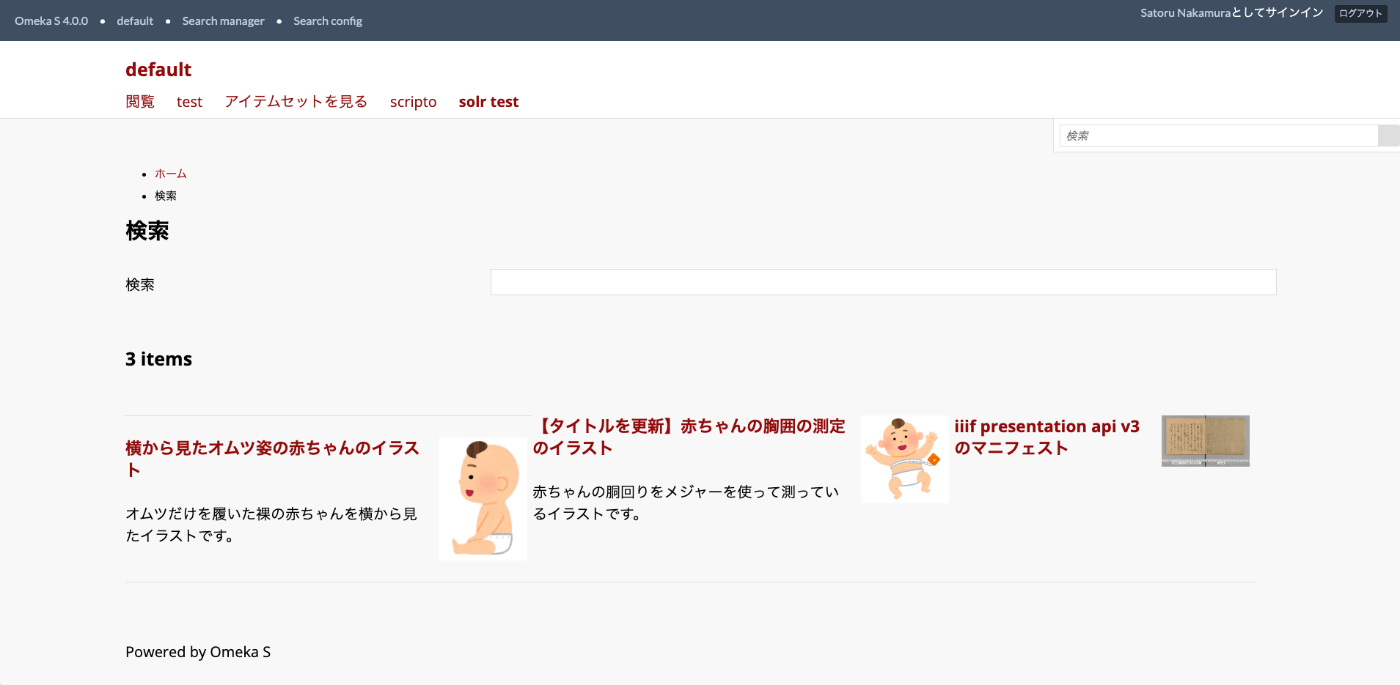
As a result, you can access the search page that displays Apache Solr query results at the following path (the Path you set earlier).
https://omekas.aws.ldas.jp/omeka4/s/default/find
However, with the configuration so far, facets and other settings have not been configured, so we will set them up below.
Configuration
Facet
First, I will explain how to configure facets.
From the Search manager page, click the pencil icon for the page you created (here, page1).
On the following screen, select the “Configure” tab at the top of the screen.
</admin/search-manager/config/1/configure>

Then, edit the items labeled “Facets” as follows.
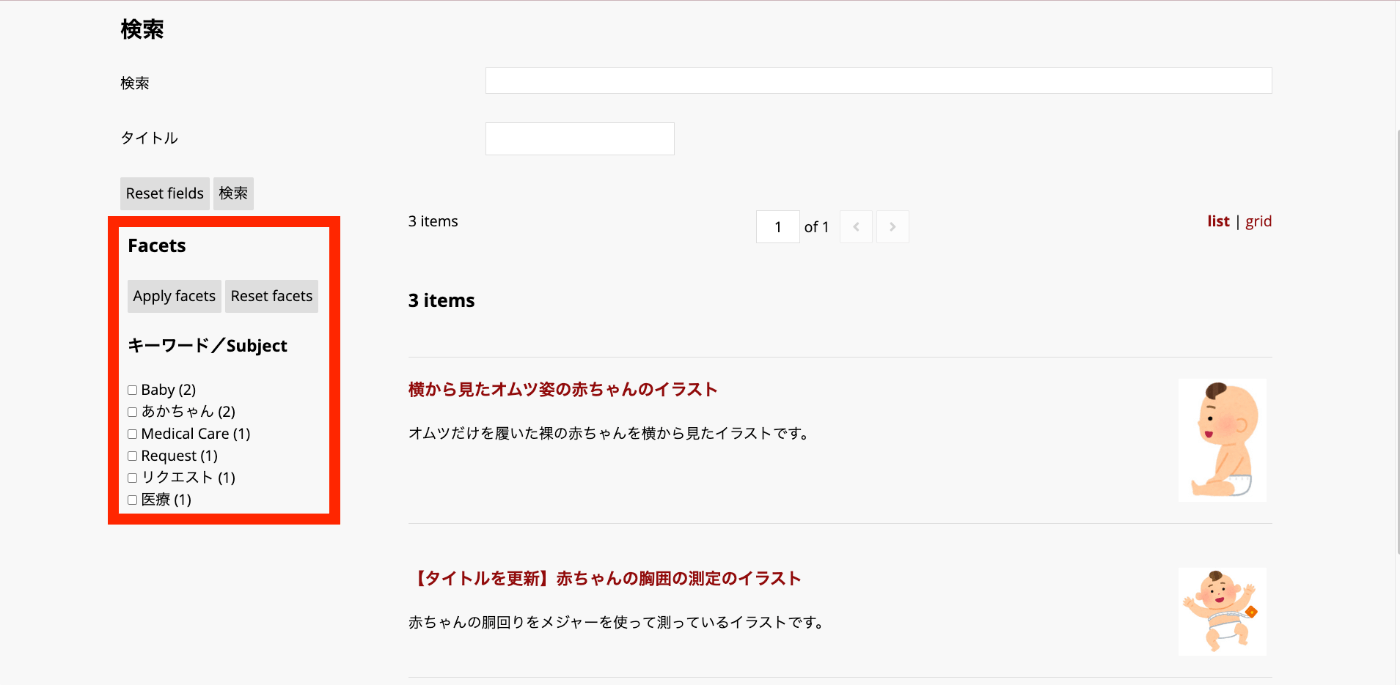
From the rows displayed in “Available facets”, copy and paste the needed rows to the List of facets. Here, we add the following filter:
dcterms_subject_ss = Subject =

As a result, facets are displayed on the Omeka S site page you created earlier, enabling filtering based on values.

Filters
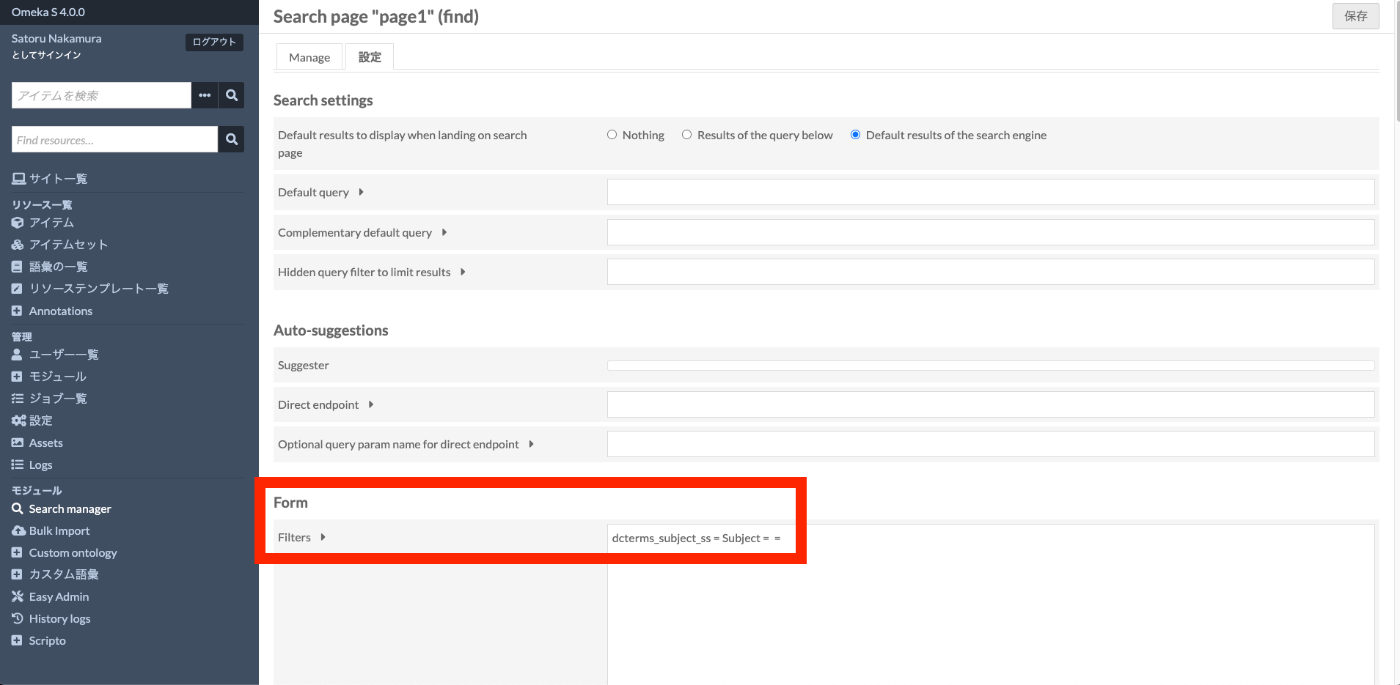
Next, here is how to configure filters for specifying search conditions.
Similar to the facets above, copy and paste the needed rows from “Available filters” to Filters. Here, we add the following filter:
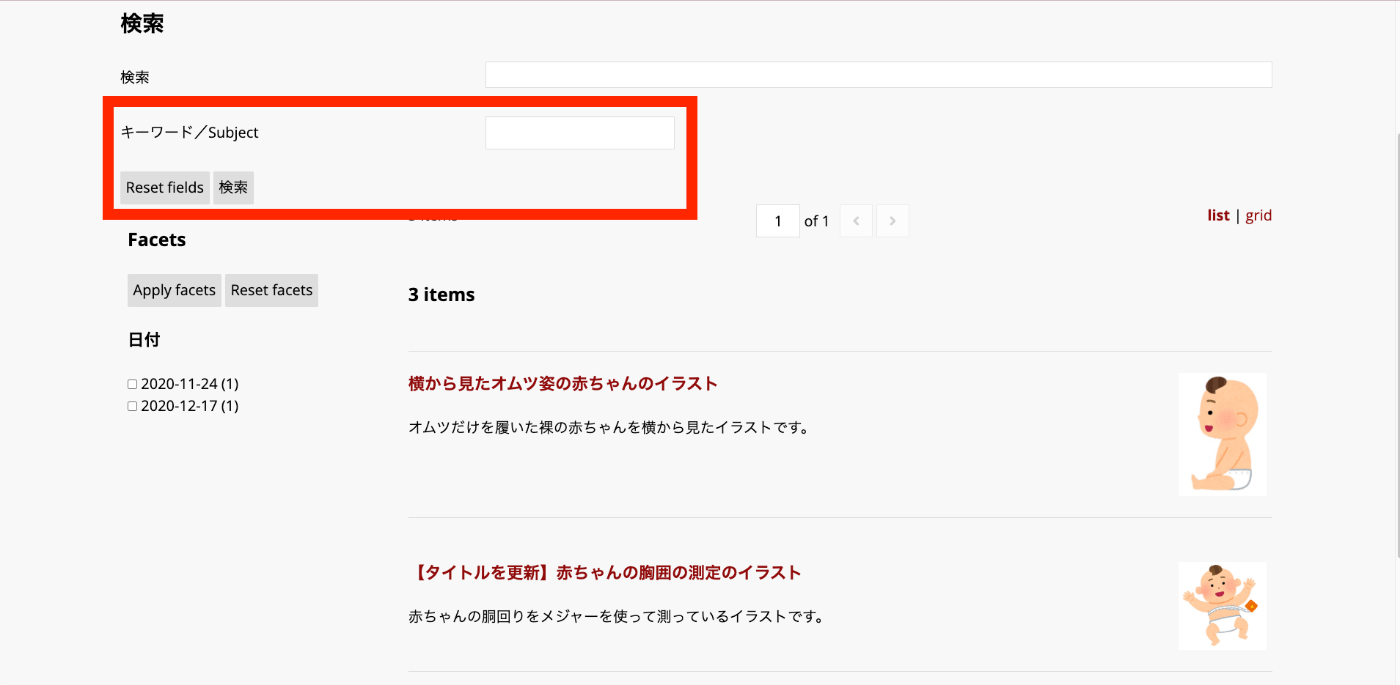
dcterms_subject_ss = Subject = =
</admin/search-manager/config/1/configure>
As a result, a “Keyword/Subject” form has been added as shown below.
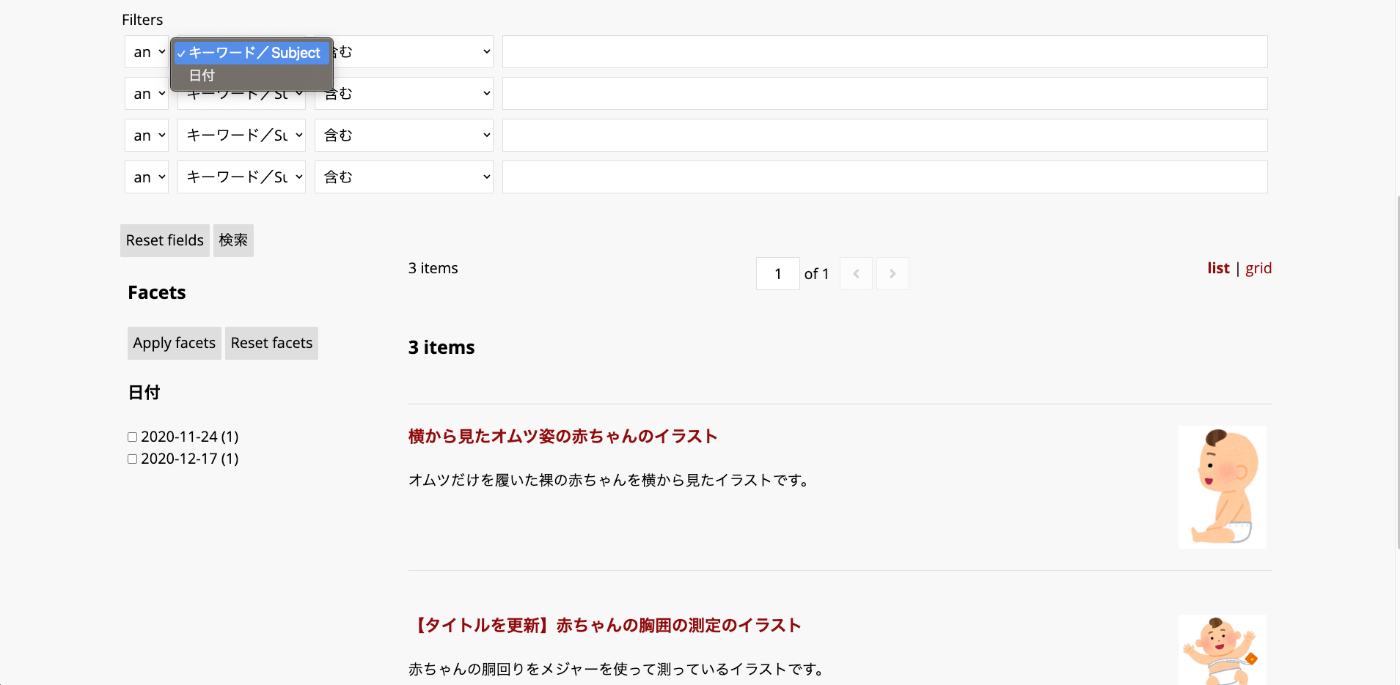
Advanced Filters
“Advanced filters” are forms that allow users to dynamically change filter conditions. For example, let’s add “Subject” and “Date” to “Advanced filters”.

The following form is displayed on the site’s search page.
Here is an example of searching for Date contains 11. Only items with 2020-11-24 as their Date were retrieved.

Other
Let’s try registering in the following format.
dcterms_subject_ss = Subject = Select = baby |medical
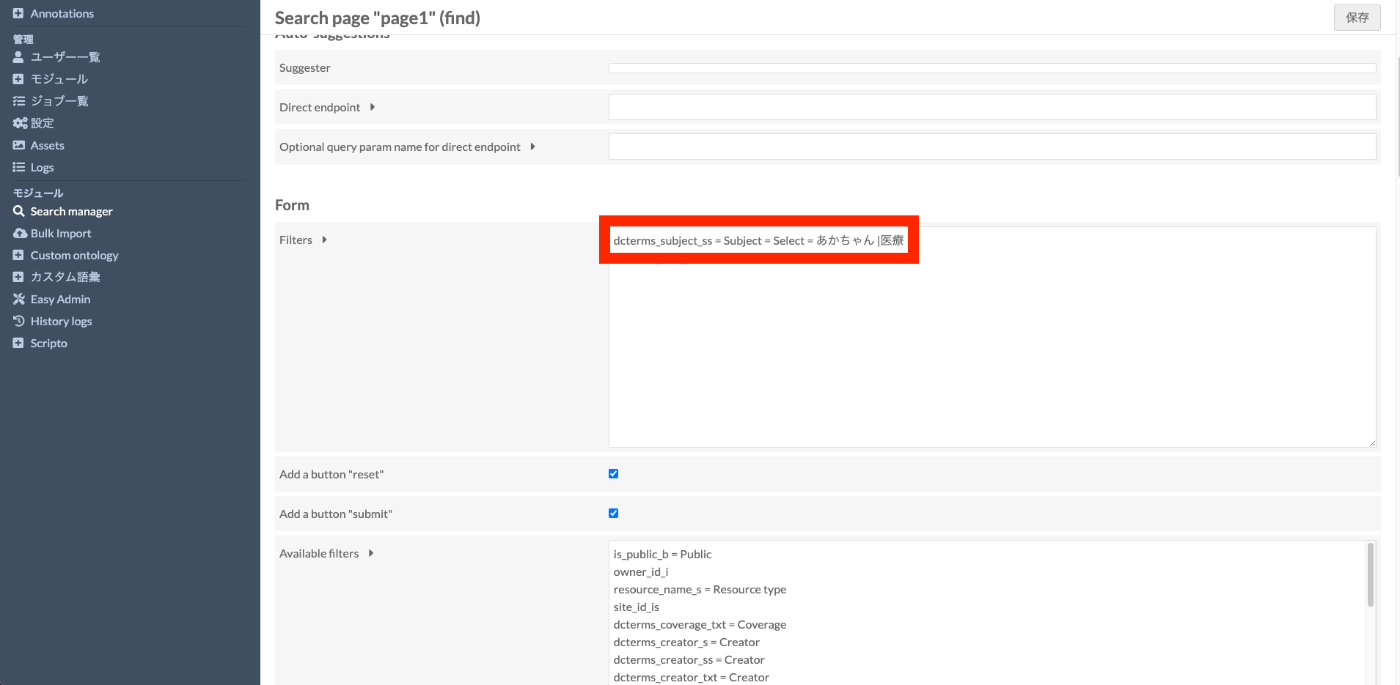
This makes it available as a select box as shown below.

Sort

https://omekas.aws.ldas.jp/omeka4/s/default/find

Japanese Language Support
Introduction
In the above settings, even for titles alone, there were 3 types available. These indicate differences in how data is indexed in Apache Solr.
- dcterms_title_s = Title
- dcterms_title_txt = Title
- dcterms_title_txt_ja = Title
For example, using the string “横から見たオムツ姿の赤ちゃんのイラスト” (Illustration of a baby in a diaper seen from the side), the indexing results are as follows.
| Field | Type | Terms |
|---|---|---|
| dcterms_title_s | string | 横から見たオムツ姿の赤ちゃんのイラスト |
| dcterms_title_txt | text_general | 横,か,ら,見,た,オムツ,姿,の,赤,ち,ゃ,ん,の,イラスト |
| dcterms_title_txt_ja | text_ja | 横,見る,オムツ,姿,赤ちゃん,イラスト |
| dcterms_title_txt_cjk | text_cjk | 横か,から,ら見,見た,たオ,オム,ムツ,ツ姿,姿の,の赤,赤ち,ちゃ,ゃん,んの,のイ,イラ,ラス,スト |
*_txtappears to apply theStandardTokenizerFactorytokenizer, indexing consecutive katakana as one term and other characters individually. (I am not entirely confident about this.)*_txt_jaapplies theJapaneseTokenizerFactorytokenizer, indexing by morphemes.*_txt_cjkapplies theCJKBigramFilterFactoryfilter, indexing in 2-character bigrams.
Due to these differences, you need to configure how Omeka S fields are handled in Apache Solr according to your purpose.
CJK Filter
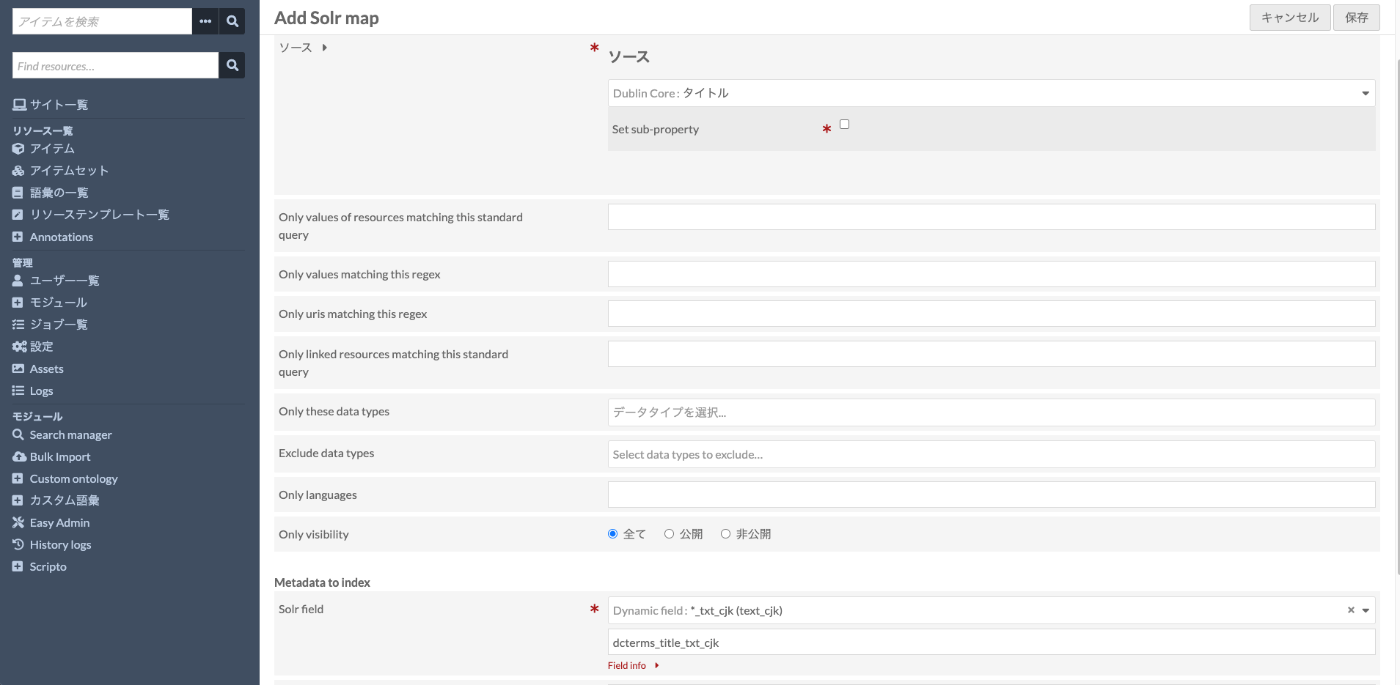
Solr Map
For example, let’s add *_txt_cjk which indexes title values in 2-character bigrams.
On the Search manager screen, select “Map Omeka metadata and Solr fields” for the Solr core, select “Resource (or Item)”, and click the “Add new map” button in the upper right.
On the following screen, select *_txt_cjk for “Solr field”.
Then perform reindexing.
Filters
Then, referring to the earlier Filters configuration, add dcterms_title_txt_cjk as follows.
</admin/search-manager/config/1/configure>

Site
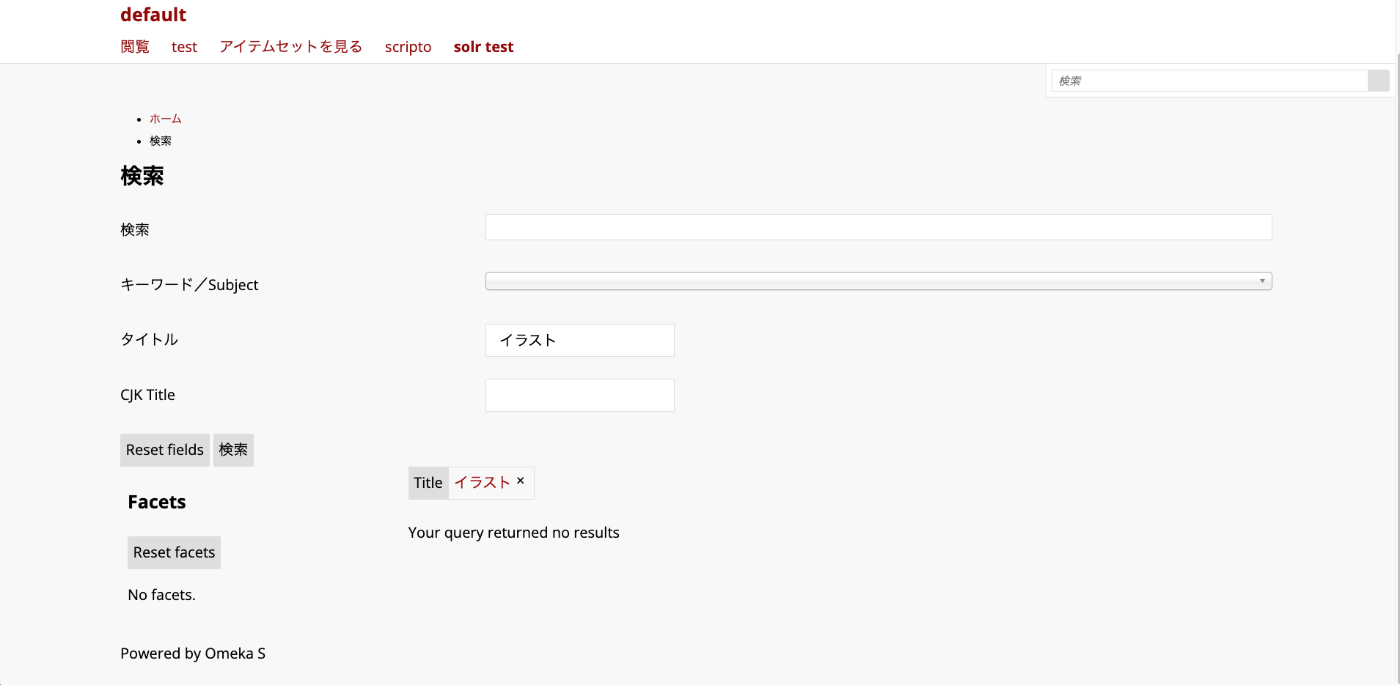
This results in the following differences.
Searching with dcterms_title_s=イラスト indexes strings like 横から見たオムツ姿の赤ちゃんのイラスト as a whole, so no items match exactly and the result is 0 items.
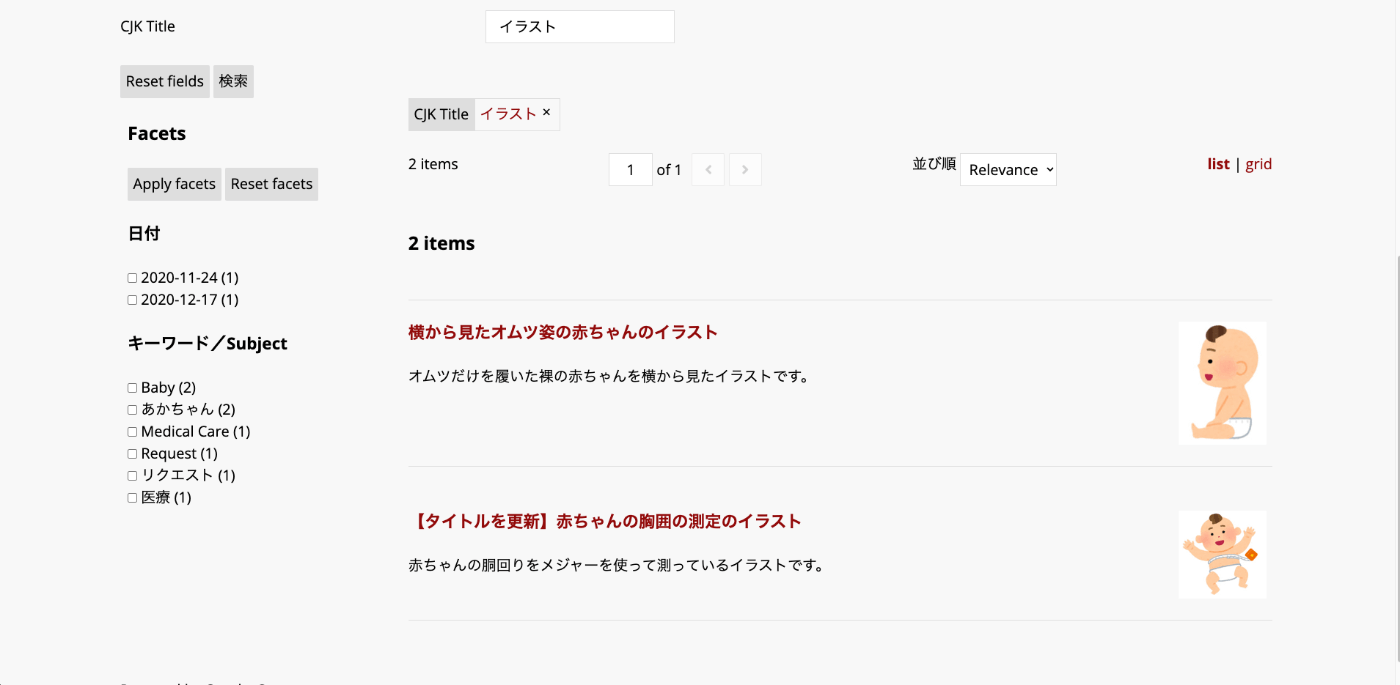
On the other hand, searching with dcterms_title_txt_cjk=イラスト indexes strings like イラ,ラス,スト, and the search term イラスト is processed the same way. Therefore, 2 items containing the string イラスト are returned.
References
Let’s examine how _txt_cjk and _txt_ja are indexed.
_txt_cjk
Target Strings
- 横から見たオムツ姿の赤ちゃんのイラスト
- 【タイトルを更新】赤ちゃんの胸囲の測定のイラスト
- iiif presentation api v3のマニフェスト
Results
</solr/#/mycol1/schema?field=dcterms_title_txt_cjk>
| Term Frequency | Term |
|---|---|
| 3 | スト |
| 2 | イラ |
| ゃん | |
| んの | |
| のイ | |
| ラス | |
| 赤ち | |
| ちゃ | |
| 1 | ら見 |
| の赤 | |
| たオ | |
| フェ | |
| ムツ | |
| を更 | |
| presentation | |
| の胸 | |
| オム | |
| の測 | |
| から | |
| ェス | |
| タイ | |
| ツ姿 | |
| トル | |
| ニフ | |
| 測定 | |
| マニ | |
| のマ | |
| 更新 | |
| ルを | |
| 囲の | |
| 定の | |
| 姿の | |
| イト | |
| 横か | |
| v3 | |
| 胸囲 | |
| 見た | |
| iiif | |
| api |
Except for English, you can confirm that strings are indexed in 2-character segments.
For example, スト appears 3 times because it is contained in both イラスト and マニフェスト.
_txt_ja

Target Strings
- 横から見たオムツ姿の赤ちゃんのイラスト
- 【タイトルを更新】赤ちゃんの胸囲の測定のイラスト
- iiif presentation api v3のマニフェスト
Results
</solr/#/mycol1/schema?field=dcterms_title_txt_ja>
| Term Frequency | Term |
|---|---|
| 2 | 赤ちゃん |
| イラスト | |
| 1 | iiif |
| v | |
| 横 | |
| オムツ | |
| マニフェスト | |
| タイトル | |
| 姿 | |
| 更新 | |
| presentation | |
| 測定 | |
| 胸囲 | |
| 見る | |
| api | |
| 3 |
Particles are excluded, and indexing is performed by morphemes such as 赤ちゃん and イラスト.
Comparison
dcterms_title_s=スト returns 0 results because it is indexed by morphemes like イラスト and マニフェスト.
On the other hand, dcterms_title_txt_cjk=スト returns 3 results. However, dcterms_title_txt_cjk=イラスト returns only 2 results. This is because only data containing all three bigrams イラ, ラス, and スト in the index will match. Data containing the string イラスト will match, while data containing マニフェスト will not.
Summary
I introduced how to connect Omeka S with Apache Solr. If you want to perform advanced searches including morphological analysis in Omeka S, this could be a useful option.
Some content may be inaccurate, but I hope it serves as a helpful reference.