Update History
- 2022/09/08 Updated the script descriptions to the latest version.
Overview
Amazon Lightsail is described as follows.
Amazon Lightsail is an easy-to-use virtual private server (VPS) that offers everything needed to build an application or website, with a cost-effective, monthly plan for managing cloud resources such as containers at predictable, low prices.
This article introduces how to build Omeka S using Amazon Lightsail. It also covers the “custom domain” and “SSL” settings that are generally required when publishing a database.
Amazon Lightsail
Creating an Instance
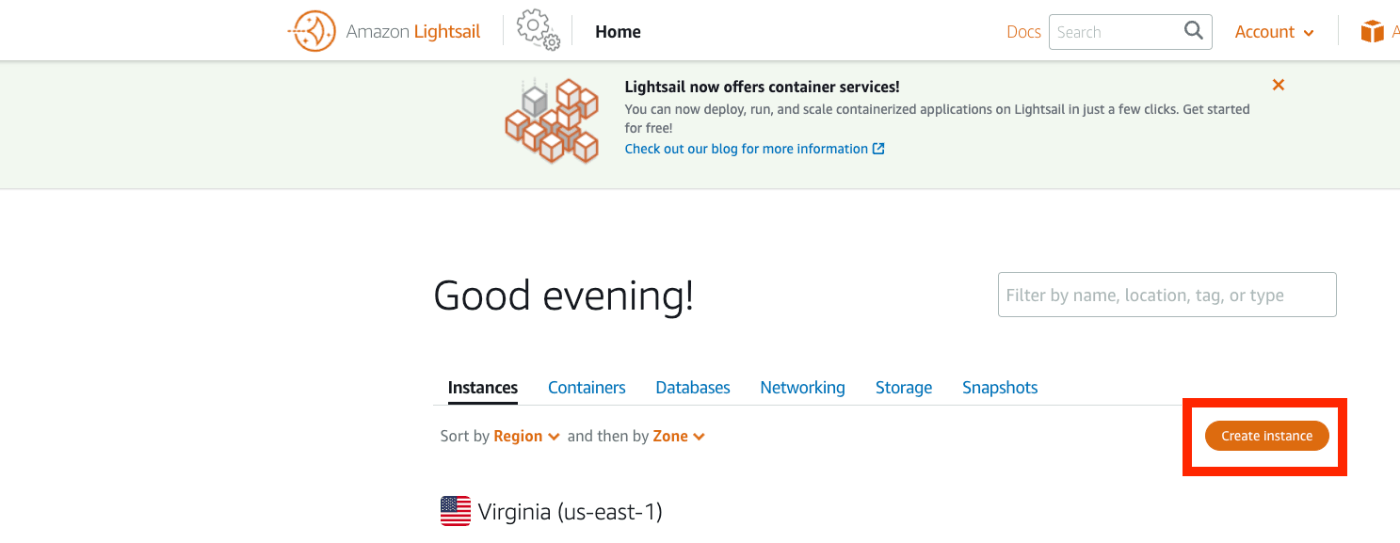
Access the following page.
https://lightsail.aws.amazon.com/ls/webapp/home/instances
Then, click the “Create Instance” button below.
In “Select a blueprint”, select “LAMP (PHP 7)”.

In “Choose your instance plan”, select an instance plan. This time I chose the lowest-priced plan.

Once launched, access the instance page below and click the “Connect using SSH” button.
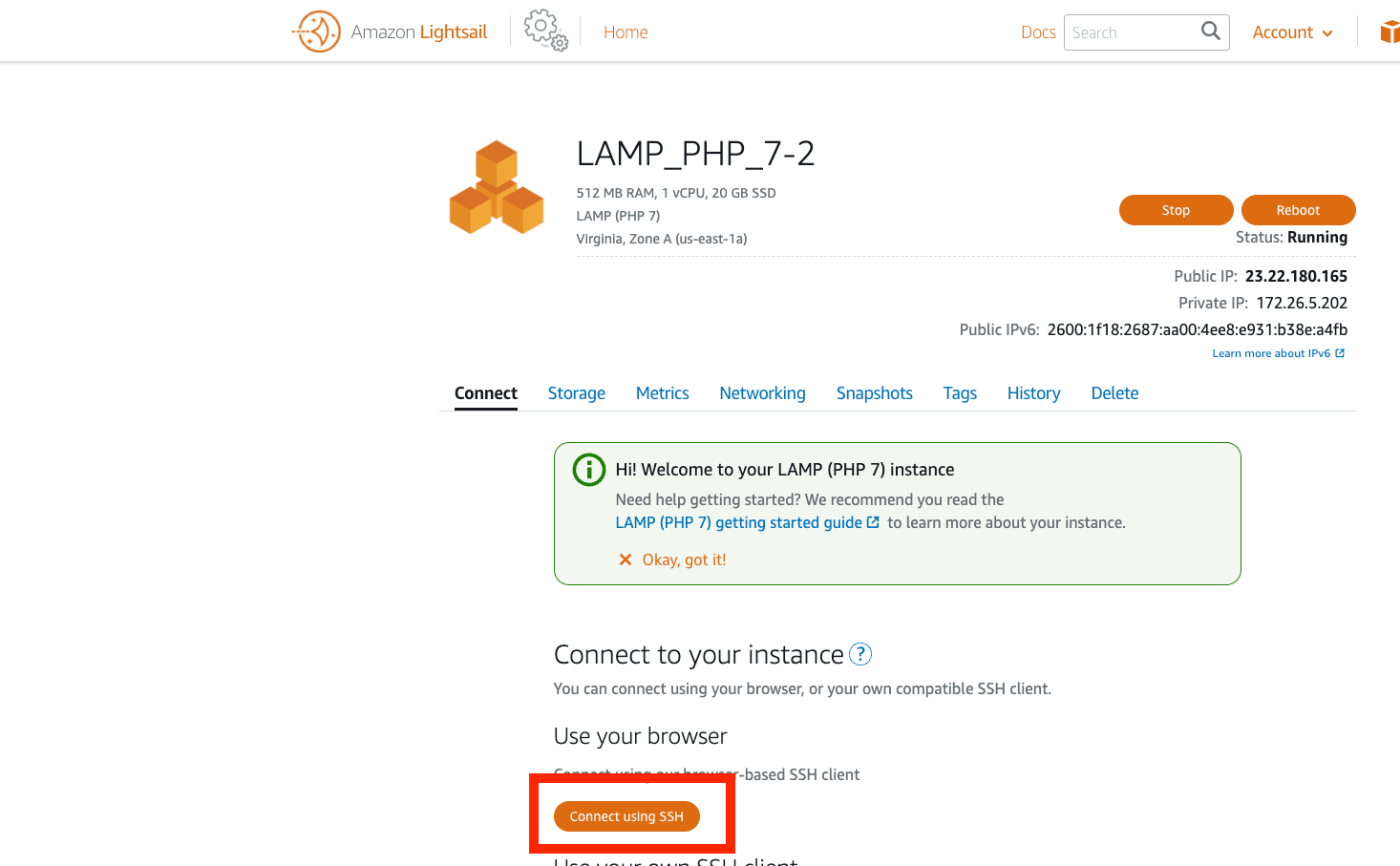
The following screen will be displayed.
Work Inside the Instance
Moving Files
First, download and move the necessary files.
Creating the Database
Next, create the database.
Configuring Omeka S
Next, modify the Omeka S configuration file.
Modify the file contents as follows.
Also, change the owner of the files folder.
Additionally, install imagemagick, which is needed for thumbnail image generation.
Browser Configuration
Access the IP address displayed in “Public IP” on the Amazon Lightsail instance screen.

The installation screen will be displayed as follows.

From here, the process is the same as basic Omeka S operations. Please refer to the following article and others to make use of Omeka S.
https://nakamura196.hatenablog.com/entry/2022/03/01/121931
Assigning a Custom Domain
From here, I’ll describe optional tasks. This covers “assigning a custom domain”, “SSL setup”, and “Basic authentication”.
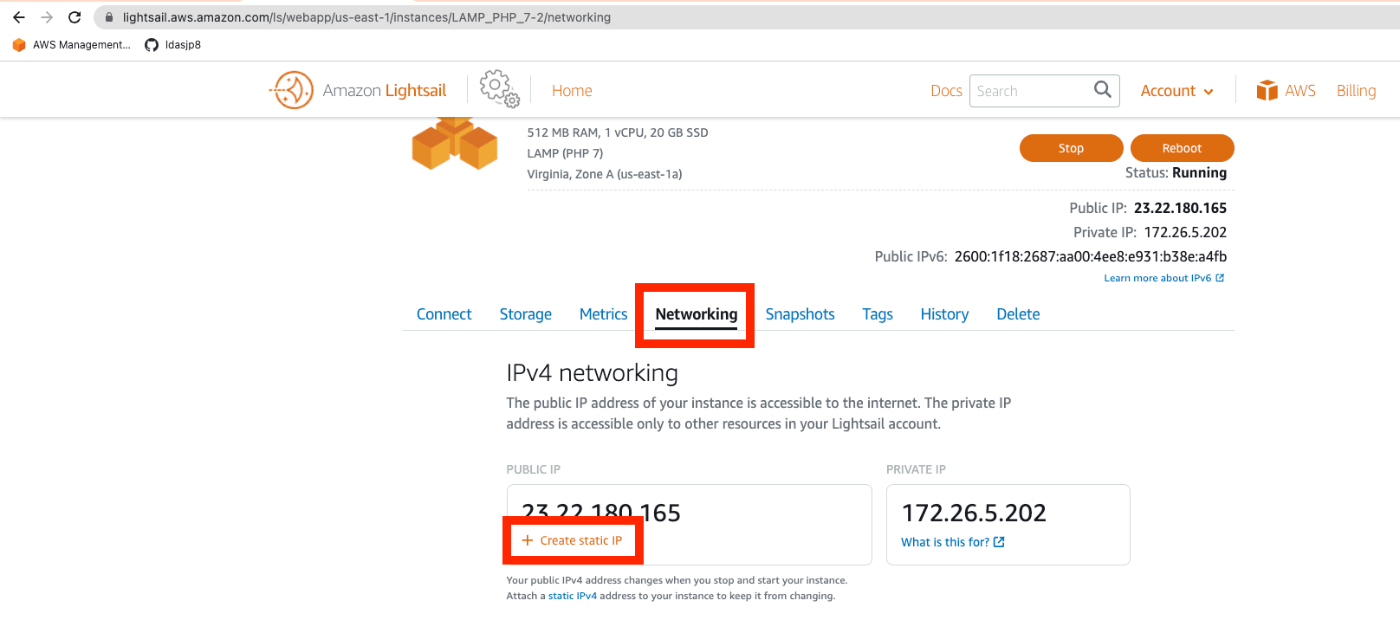
Assigning a Static IP Address
For assigning a custom domain, first assign a static IP address. Click the “+ Create static IP” link from the “Networking” tab.
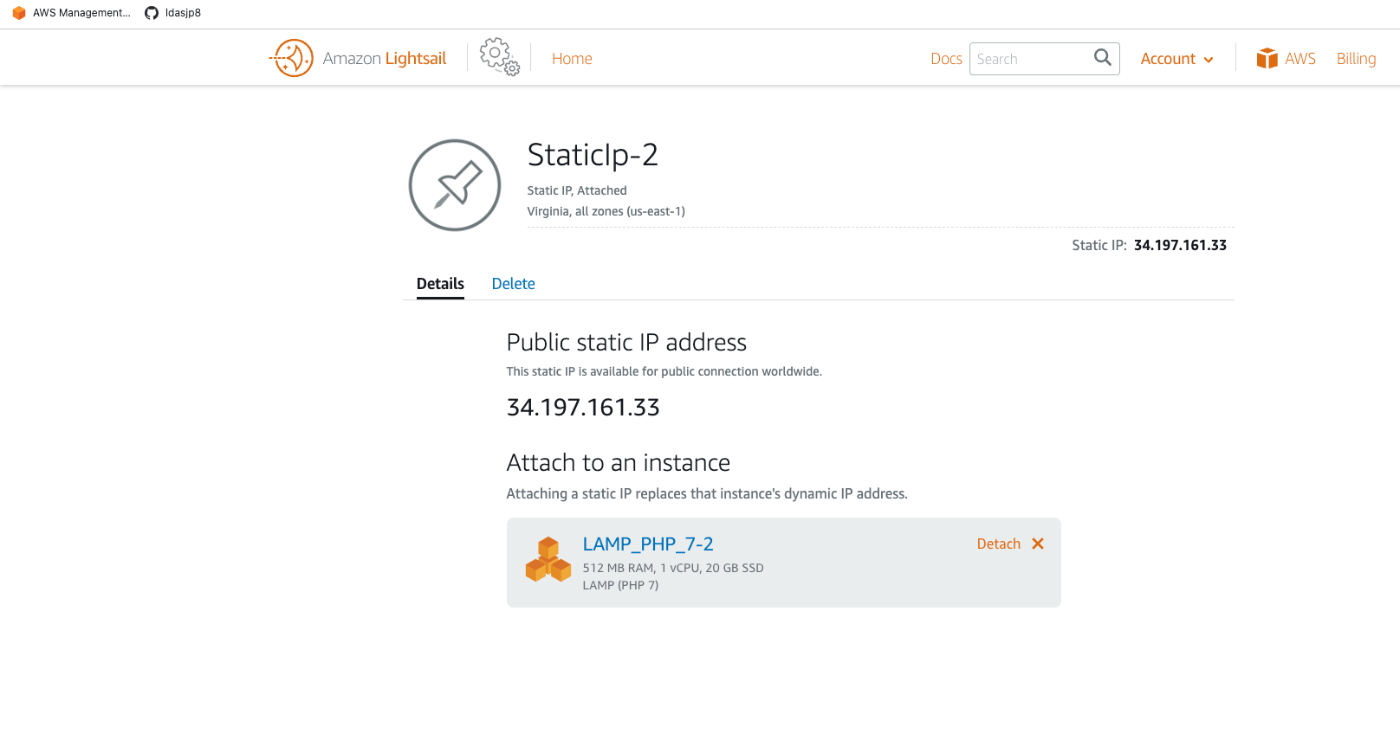
Press the “Create” button on the following screen.

As a result, a static IP address was assigned.
Route 53
Here, we assign a custom domain using Route 53. For example, configure it as follows.
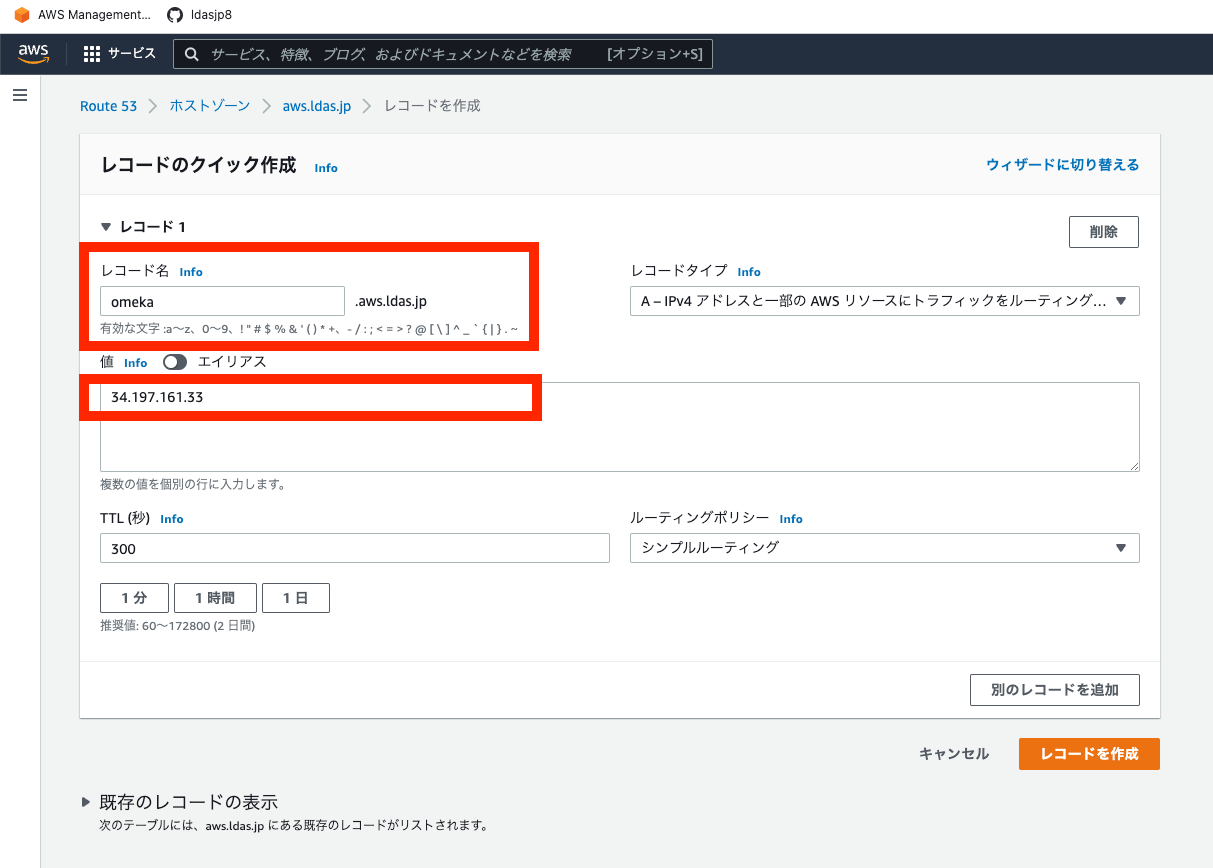
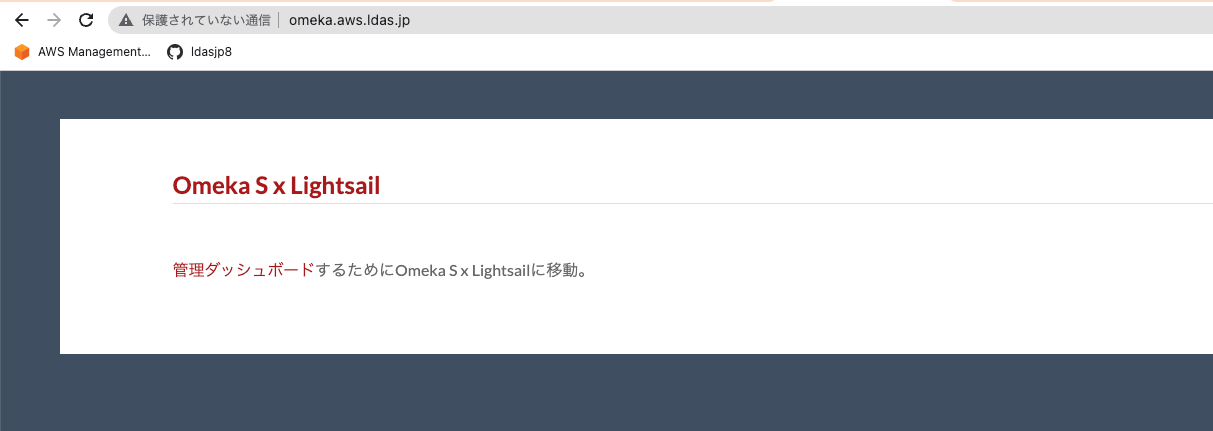
After a while, you will be able to access it at an address like the following.
SSL Setup
Next, set up SSL. Access the instance via SSH again and run the following.
Answer the questions as follows. (The following is a partial excerpt.)
With this, accessing the previous URL will redirect to HTTPS.
With the work so far, the minimum publishing environment with a custom domain and SSL is ready.
(Reference) Basic Authentication
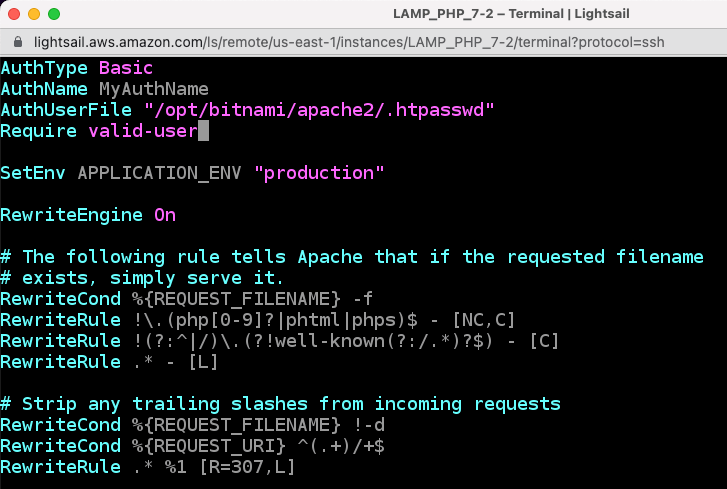
This time I needed to set up Basic authentication, so here are my notes. First, create a user.
Next, add the authentication information to the beginning of .htaccess.
0
1
As a result, Basic authentication was applied as shown below.

Summary
Above, I summarized the basic setup method for Omeka S using Amazon Lightsail, along with optional tasks such as Basic authentication.
I hope this serves as a helpful reference when building digital archive systems using Omeka S.