Overview
This is a 2024 edition article on building an IIIF Image Server using AWS serverless applications.
Background
The following repository called serverless-iiif is publicly available. Using this repository, it is claimed that a cost-effective and infinitely scalable IIIF Image Server can be built using AWS services.
https://github.com/samvera/serverless-iiif
I introduced how to use it as of 2022 in the following article, but today’s service has become more user-friendly.
Method
There are several build methods, but for a GUI-based approach, refer to the following. Basic setup follows the instructions on the site below. Here, I introduce the procedure including custom domain setup with CloudFront and Route 53.
Creating the Lambda
https://samvera.github.io/serverless-iiif/docs/quick-start/deployment-sam
First, access the following.
Several settings need to be configured for serving via a custom domain.
First, enter the desired custom domain name in the ForceHost field.

Next, enter the bucket name in SourceBucket. In the example below, the name happens to be the same as the custom domain, but any bucket name can be entered.

Finally, check “I acknowledge that this app creates custom IAM roles” and click the “Deploy” button.
On the subsequent screen, select the “Deployments” tab and click the “CloudFormation stack” link.

Navigating to the “Outputs” tab reveals the v2 and v3 endpoints.

Creating Tiled TIFFs
Refer to the following page to create tiled TIFF files.
https://samvera.github.io/serverless-iiif/docs/source-images
Alternatively, you can download a tiled TIFF file converted from an image of “Illustrated Map of Iwami Province” (a copy from the mid-Edo period, National Diet Library Digital Collection) from the following. Please use it as sample data.
https://github.com/nakamura196/iiif-sampledata/raw/main/1286204.tif
After uploading this file to the Amazon S3 bucket specified earlier, the Image API can be accessed from a URL like the following.
https://istxbnjtm5x7qcpkwapsznyltm0sufnb.lambda-url.us-east-1.on.aws/iiif/3/1286204/info.json
Note that the id in the resulting JSON file is set to https://iiif.aws.ldas.jp/iiif/3/1286204.
This reflects the value specified in ForceHost in the earlier configuration.
For viewing images, Image Annotator created by Masahide Kanzaki is convenient. You can display an image by specifying the URL with the u parameter as follows.
Custom Domain Setup
Finally, set up the custom domain.
First, create a distribution in CloudFront. For Origin domain, enter the URL up to on.aws that was accessed earlier.
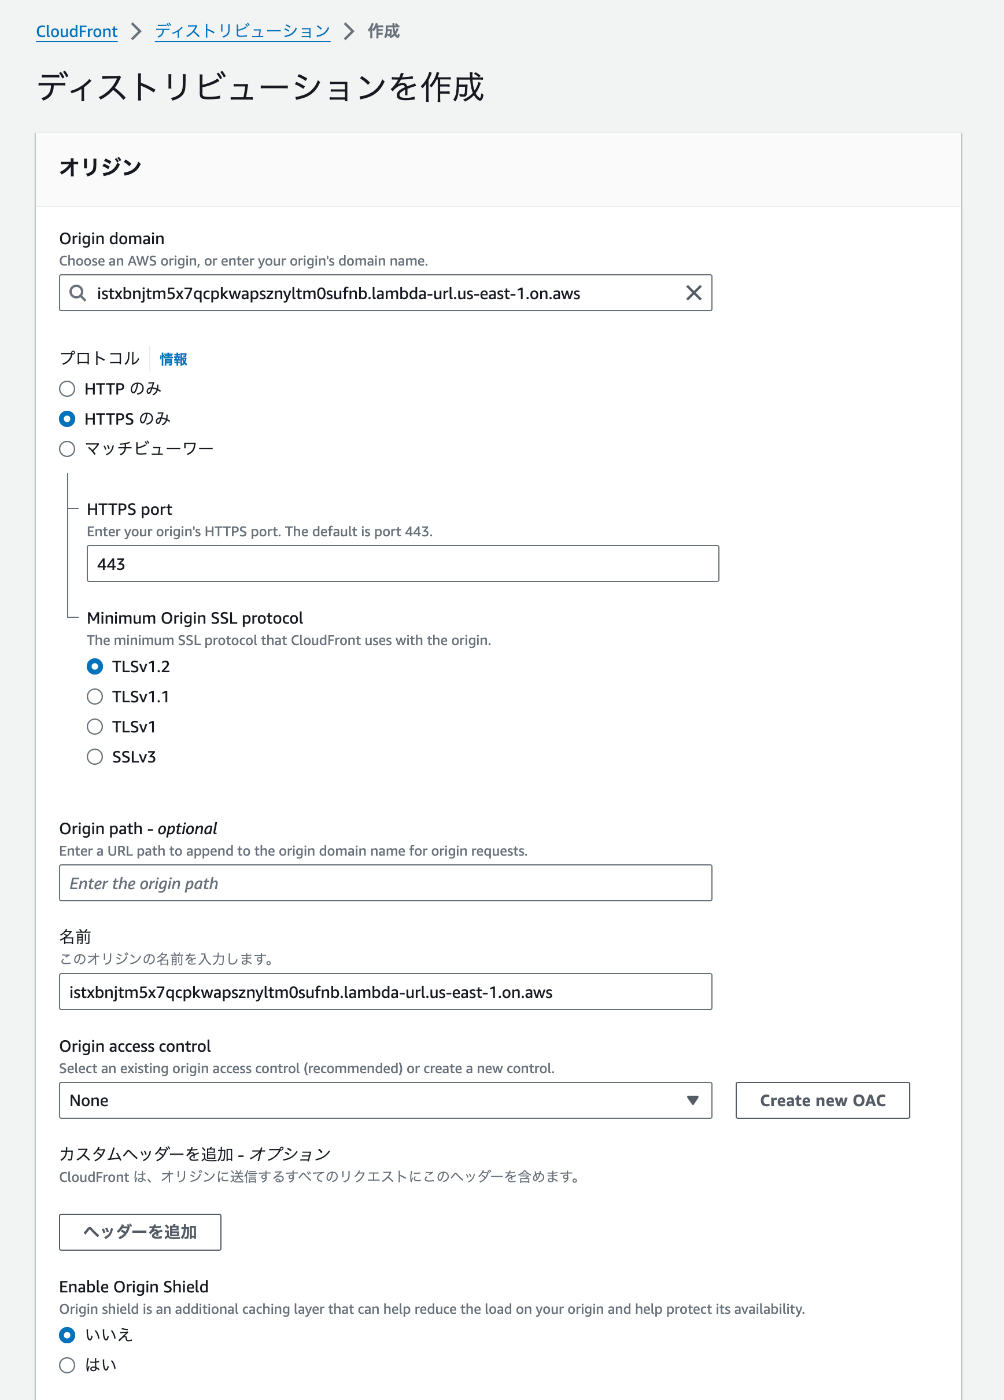

Then, in the “Alternate domain names (CNAME)” section, enter the desired domain name. Also configure the “Custom SSL certificate.”

This completes the CloudFront configuration.
Finally, configure the Route 53 settings to point to the CloudFront distribution.

As a result, the JSON file can be retrieved from the following URL.
https://iiif.aws.ldas.jp/iiif/3/1286204/info.json
Summary
There may be some errors, but I hope this serves as a helpful reference for building an IIIF Image Server with AWS serverless applications.