Introduction
These are notes on building a Virtuoso RDF store using AWS EC2. This covers custom domain configuration, HTTPS connection, and Snorql installation.
There are many other useful articles on building Virtuoso. Please refer to them as well:
https://midoriit.com/2014/04/rdfストア環境構築virtuoso編1.html
https://qiita.com/mirkohm/items/30991fec120541888acd
https://zenn.dev/ningensei848/articles/virtuoso_on_gcp_faster_with_cos
Prerequisites
An ACM Certificate should already be created. Please refer to articles such as the following:
https://dev.classmethod.jp/articles/specification-elb-setting/#toc-3
EC2
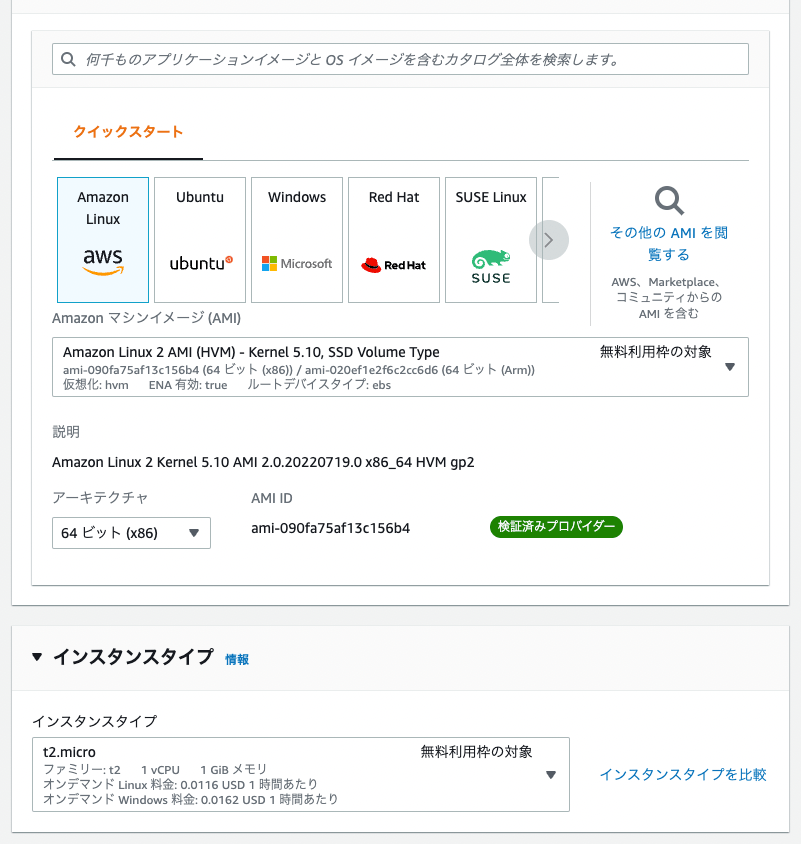
First, create an EC2 instance.
Select Amazon Linux, and set the instance type to t2.micro.
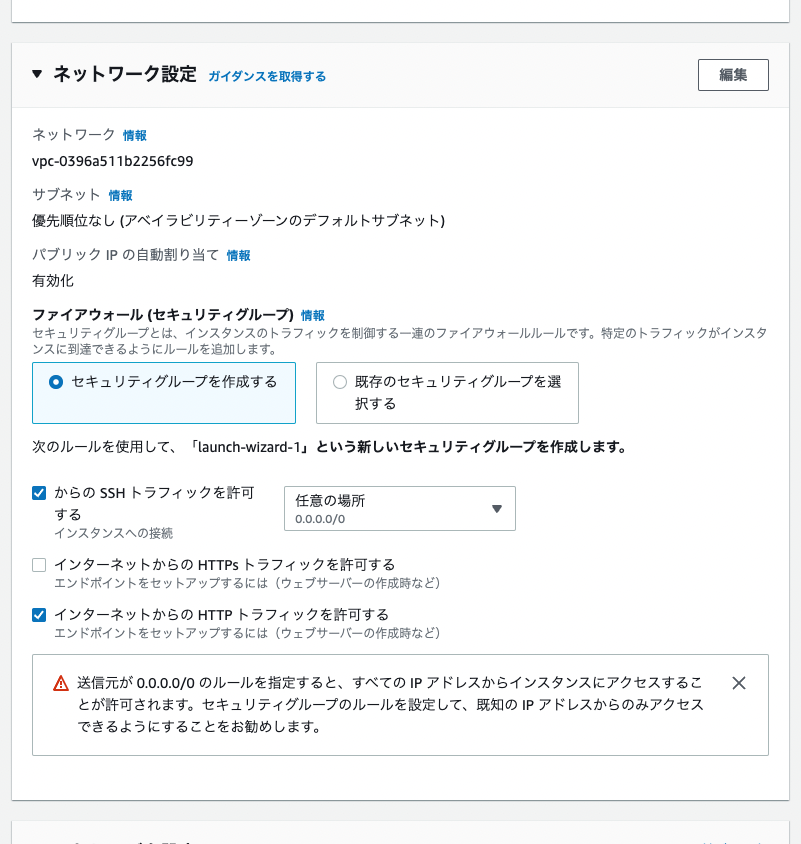
For network settings, select “Create security group” and check both “Allow HTTPS traffic” and “Allow HTTP traffic” (note that in the figure below, only the latter is checked).
Once the instance state becomes “Running”, click the “Connect” button in the upper right corner to connect to the server.

After connecting, run the following to set up the Apache server:
Creating an ELB
Select “Target Groups” under “Load Balancing”.

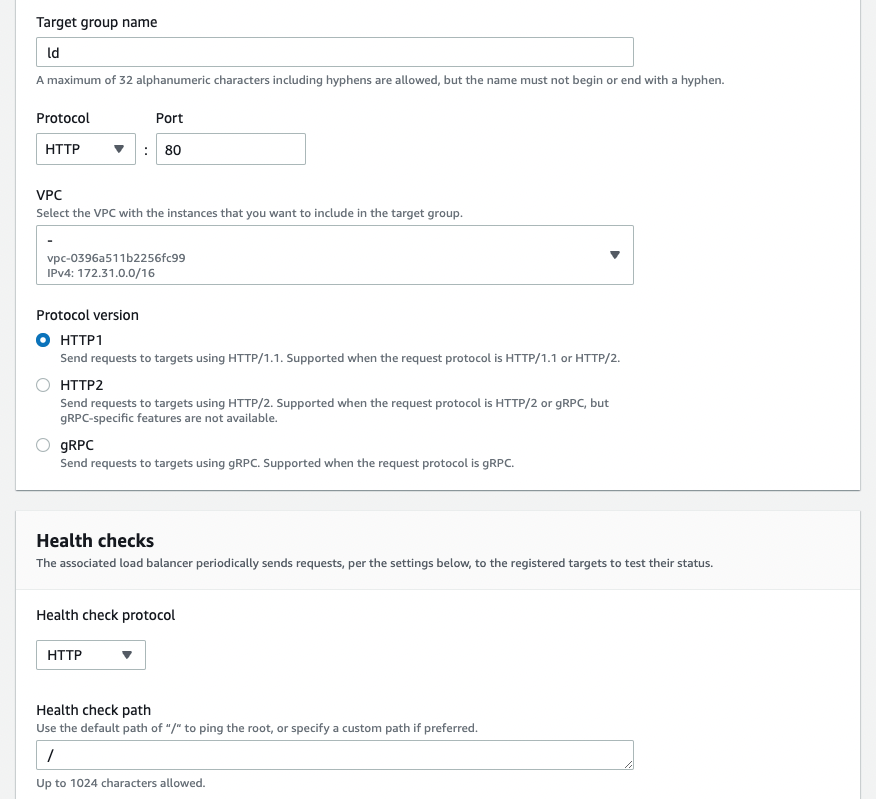
From “Create target group”, select “Instances” in [Basic configuration] and configure as shown below. The “VPC” is the same one used by the EC2 instance launched earlier.
On the “Register targets” screen, select the instance at the top and click the “Include as pending below” button. The selected instance will then move to the bottom of the screen as shown below:
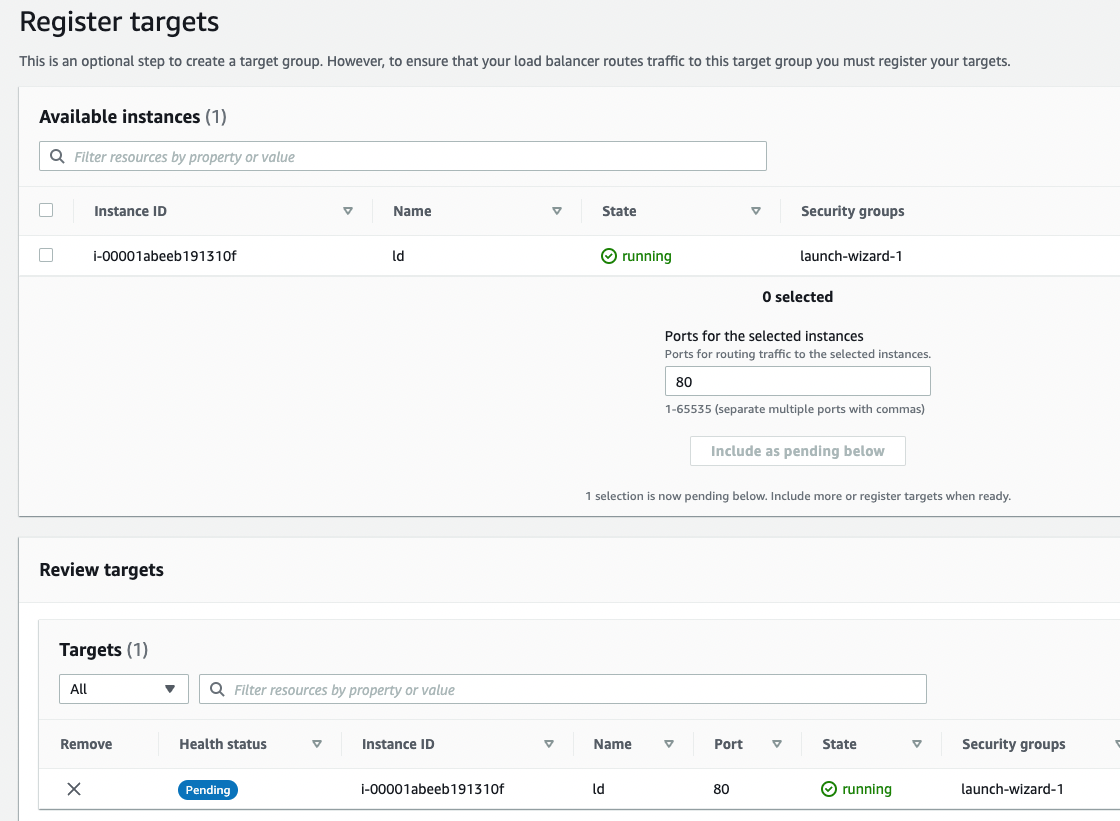
Then click the “Create” button.
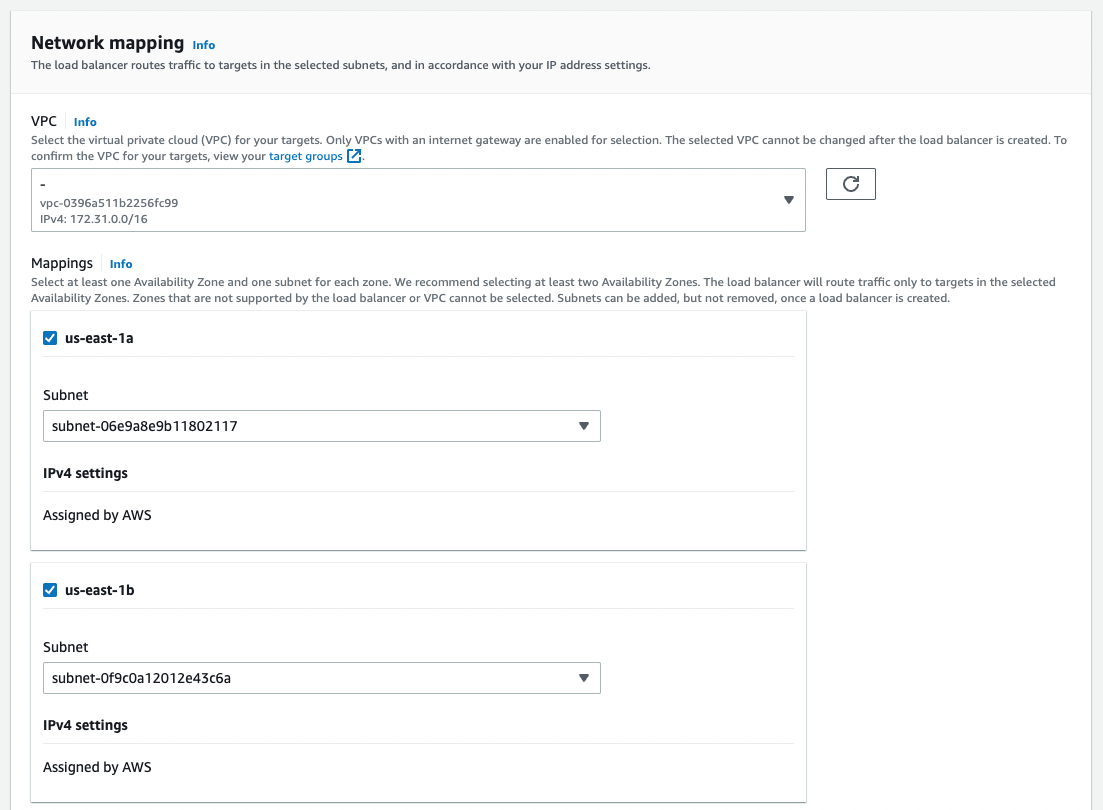
Next, create a load balancer from “Load Balancers” > “Create Load Balancer”.
Select “Create Application Load Balancer” and choose multiple subnets under “Network mapping” as shown below:
A key point here is that under “Security groups”, remove the pre-selected “default” and select the security group created when creating the EC2 instance, such as “launch-wizard-XX”.
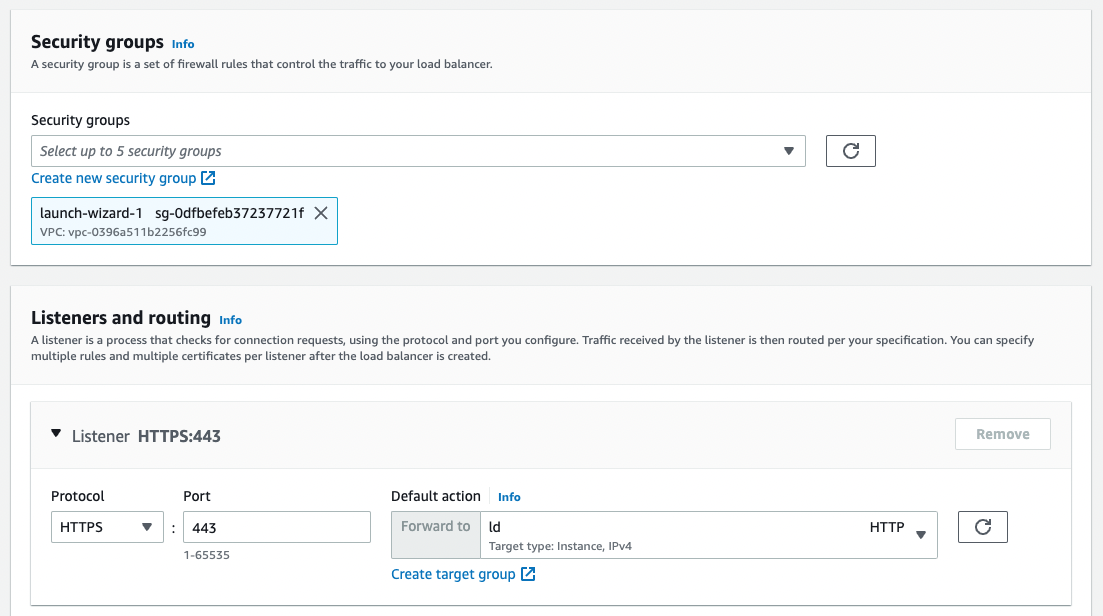
For “Listeners and routing”, select “HTTPS” and set “Forward to” to the target group you just created.
Additionally, under “Secure listener settings” > “Default SSL/TLS certificate”, select the previously created ACM certificate from “From ACM”.
Then click the “Create” button at the bottom of the screen.
Route 53
After setting the record name, enable “Alias” and select the ALB alias as shown below.
Then click “Create records” at the bottom of the screen.
If you can establish an HTTPS connection to the specified custom domain, the setup is successful.
Installing Virtuoso
Install Virtuoso by following the article from Midori IT LLC below:
https://midoriit.com/2014/04/rdfストア環境構築virtuoso編1.html
Run the following commands (with some modifications from the article above):
Then run the following to start Virtuoso:
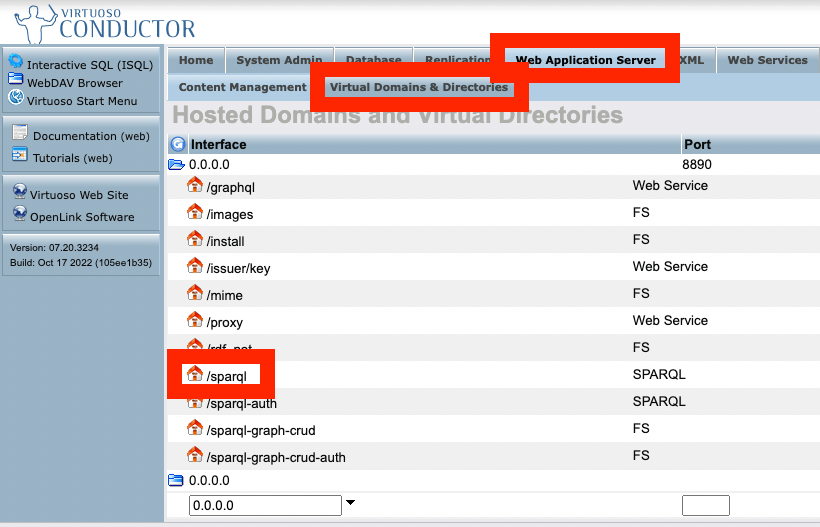
Exposing the SPARQL Endpoint on Port 80
Next, configure the SPARQL endpoint to be accessible on port 80. Again, follow the article from Midori IT LLC:
https://midoriit.com/2014/06/rdfストア環境構築virtuoso編3.html
Enter the following:
Then restart Apache:
Enabling CORS
With the settings above, you can access the conductor via the browser at the following URL. abc.xyz is the custom domain set up earlier:
Enable CORS by following this article:
https://qiita.com/misshie/items/f603bf5a3971ab576907
Specifically, follow these steps:
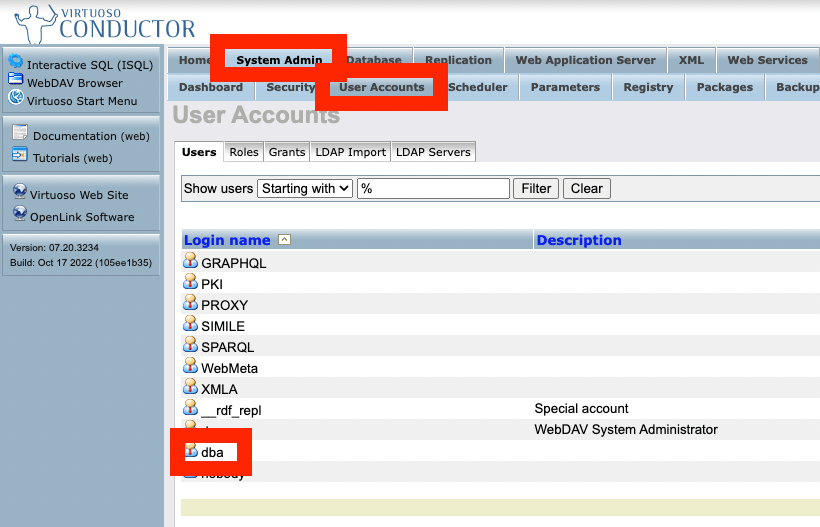
Changing Passwords
Change the default passwords for accounts like dba. Specifically:
Setting Up Snorql
Snorql is a browser-based SPARQL interface. It is also used by Japan Search.
https://www.kanzaki.com/works/ld/jpsearch/snorql_ldb-about
Here, we copy “Snorql for Japan Search” and place it in /var/www/html.
While connected to the server, run the following:
This will display Snorql when you access https://abc.xyz/.
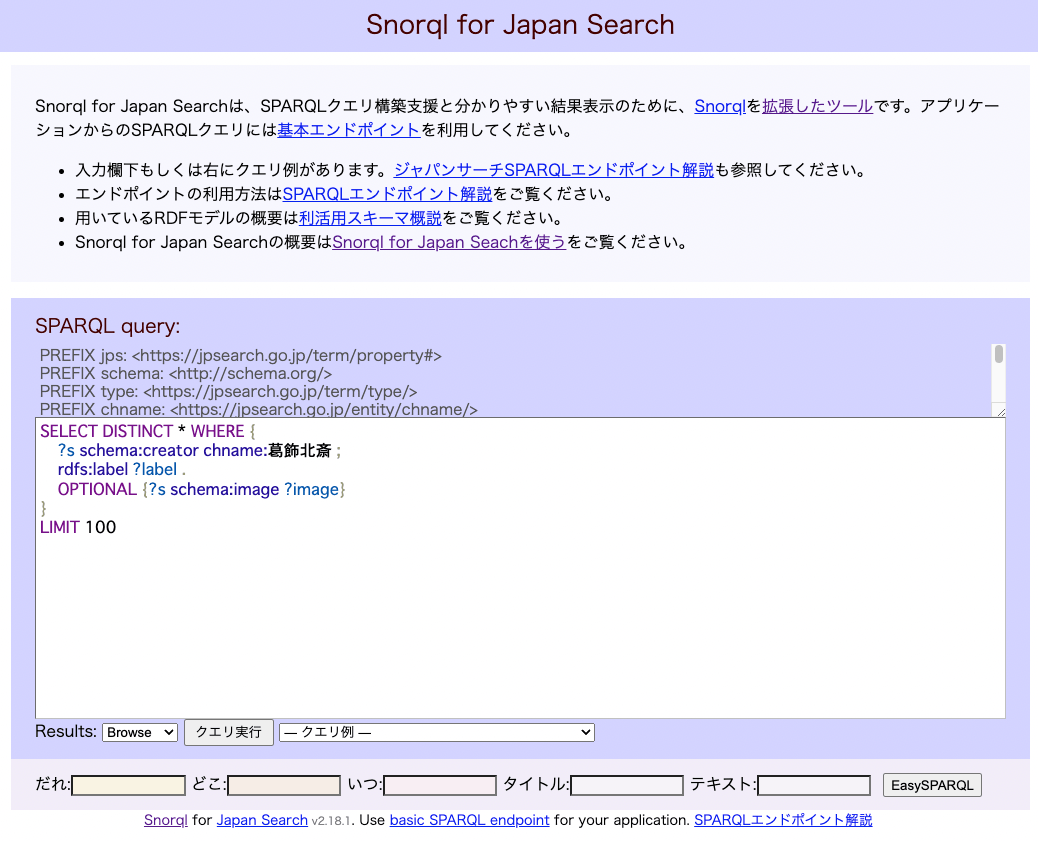
The text on the page above can be modified as needed later.
Adding Data
Register RDF data by following articles such as:
Summary
I have documented the entire procedure for setting up Virtuoso and Snorql on EC2. In addition to this, various other settings are needed, including strengthening security groups and handling the dba user password and other configurations.
I plan to write about these in a future article.
I hope this serves as a useful reference for building a SPARQL endpoint.