Overview
Drupal’s Simple OAuth (OAuth2) & OpenID Connect module is described as an implementation of the OAuth 2.0 Authentication Framework RFC.
https://www.drupal.org/project/simple_oauth
For related articles, please also refer to examples of cookie authentication and JWT authentication.
Installation
There appear to be version 5.x and 6.x of the simple_oauth module, but this time version 5.x is used. Install with the following:
However, when using Sakura Rental Server, the following error occurred. PHP's sodium extension was required.
Therefore, following the reference below, I added the PHP-sodium extension.
https://qiita.com/tomcat0090/items/2564baa9179747b4d855
However, since the above site targets PHP version 8.0.x while the PHP version I am using is 8.1.24, I made some changes to the “3. Download and Compile PHP Extension” section.
After performing the above, running the following again resulted in successful module installation.
Then, the module was enabled with the following.
Creating an OAuth Client
I was unable to find documentation on configuring the simple_oauth module, but this time I will reference the following “Next.js for Drupal” documentation.
https://next-drupal.org/learn/preview-mode/create-oauth-client
Since the operating procedures are described in the above documentation, I will provide screenshots and notes below.
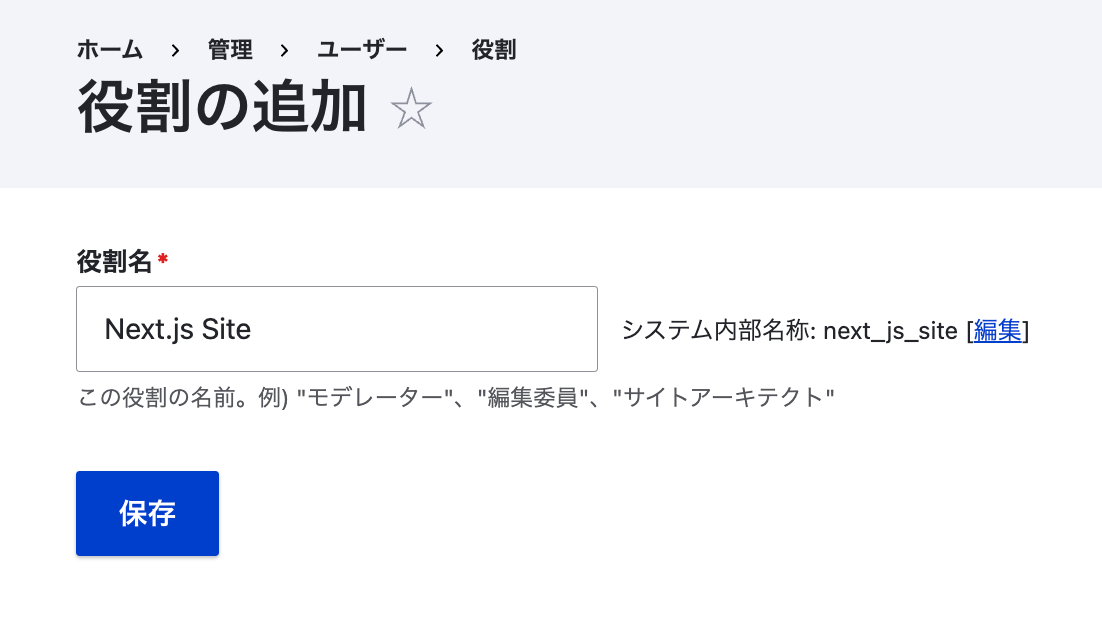
1. Create Role
/admin/people/roles
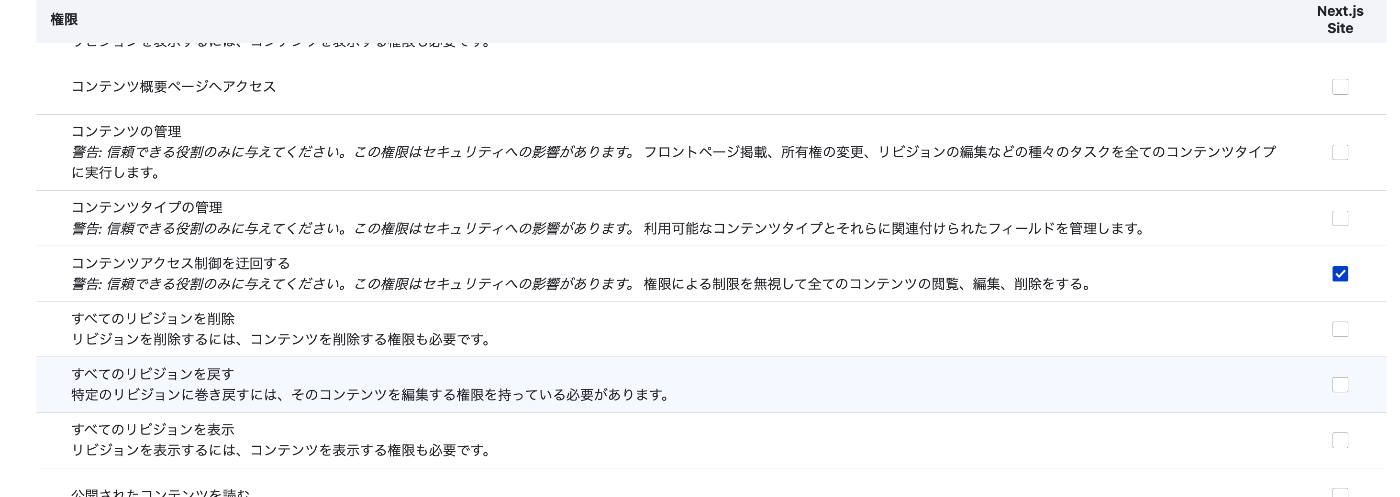
2. Assign Permissions
In particular, Bypass content access control appeared to be a necessary item for the subsequent process.
3. Create User
/admin/people/create
This time, I created a user named next.

4. Generate Keys
/admin/config/people/simple_oauth
For Generate keys, ../ is given as an example, but when using Sakura Rental Server, a path like /home/{username}/.ssh/drupal is more appropriate.
Therefore, first create a folder with a command like the following:
Enter the above path in the form displayed when clicking the Generate keys button.
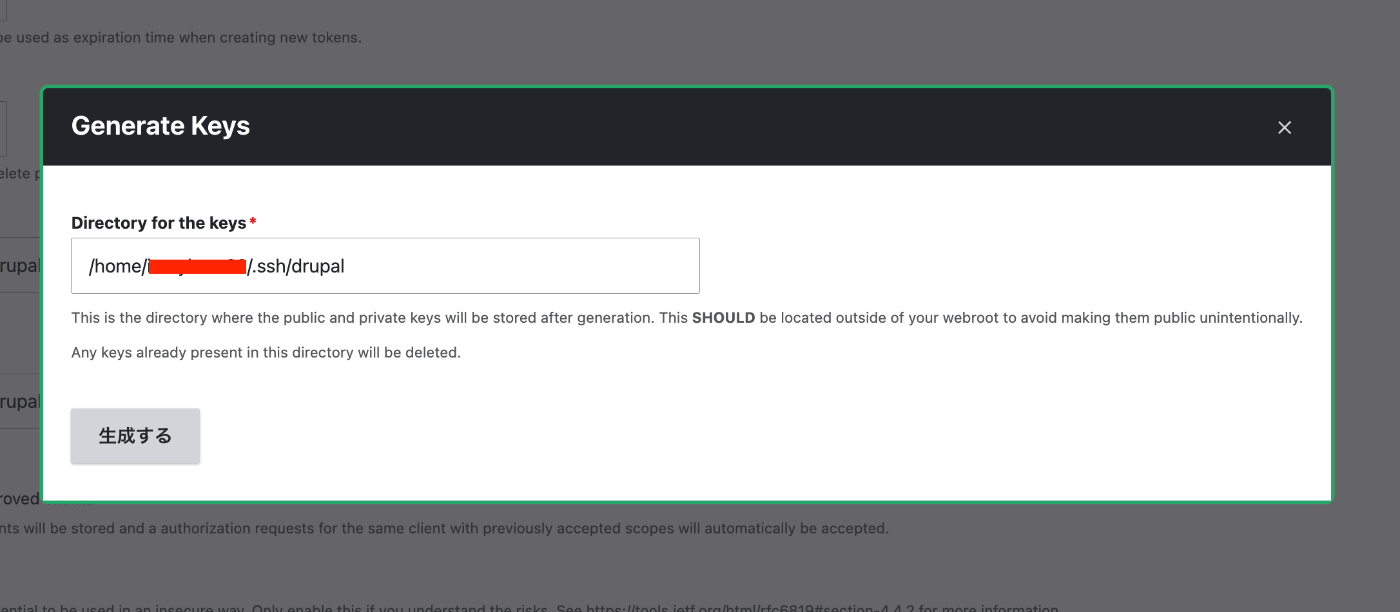
After that, click the “Save configuration” button to save the settings.
5. Create Consumer
/admin/config/services/consumer/add
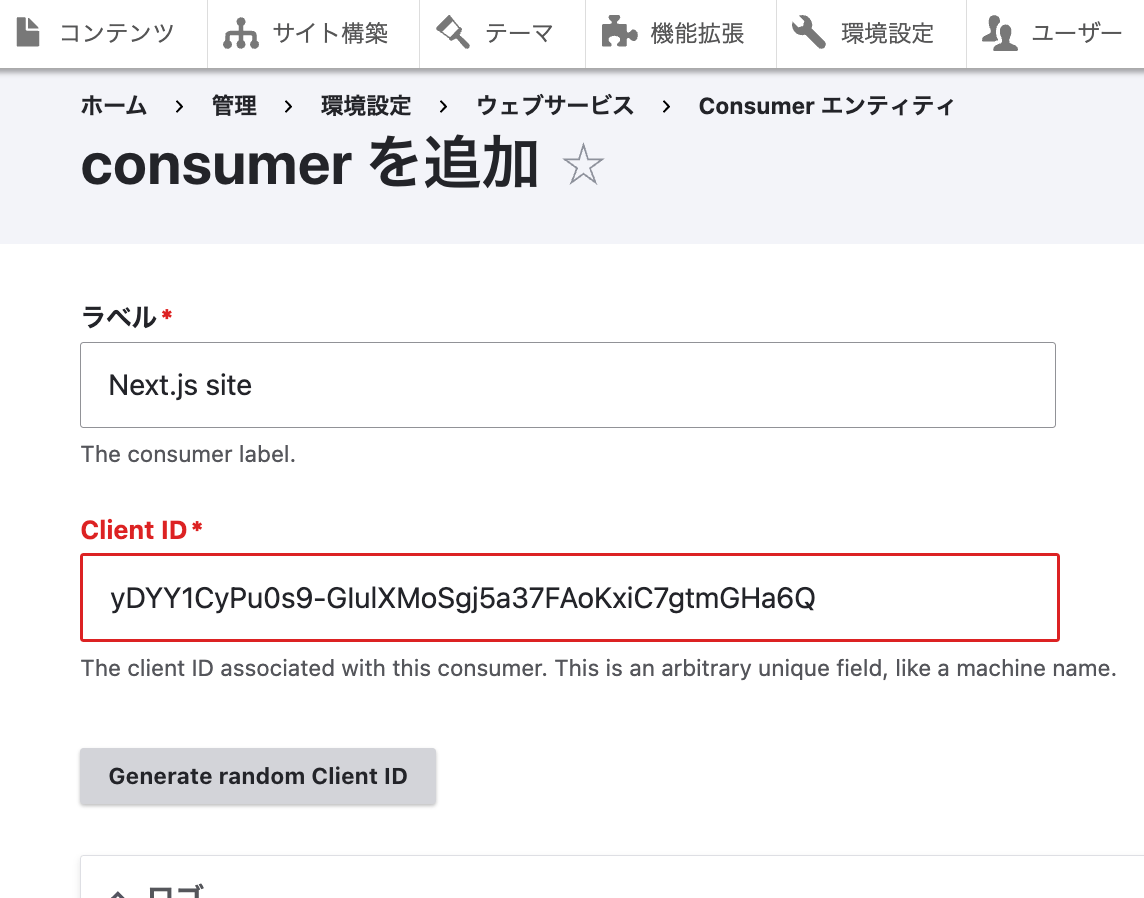
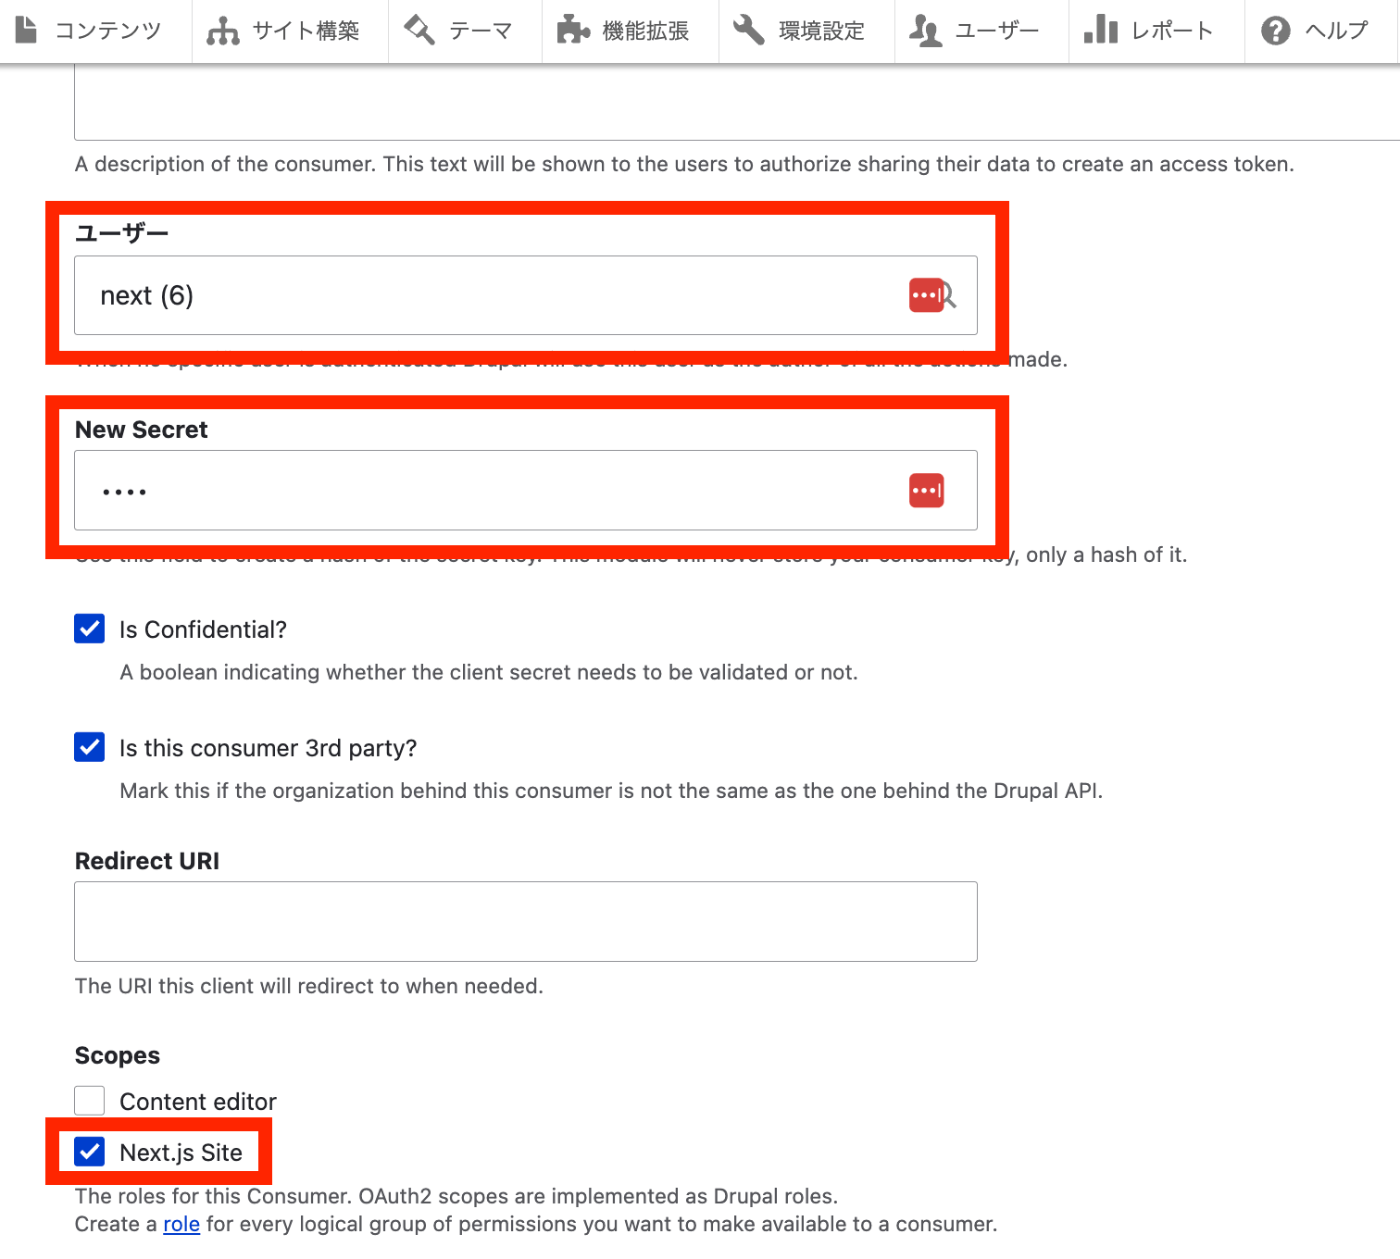
The OAuth client creation is now complete.
Testing with Postman
Specify POST with {DRUPAL path}/oauth/token.
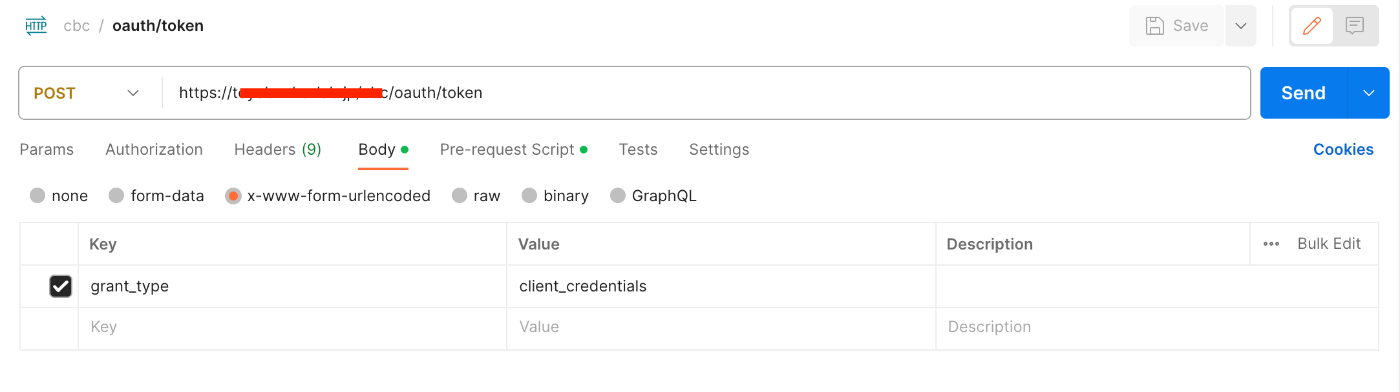
In Body, specify x-www-form-urlencoded, with Key as grant_type and Value as client_credentials.
Also, specify the following in Pre-request Script.

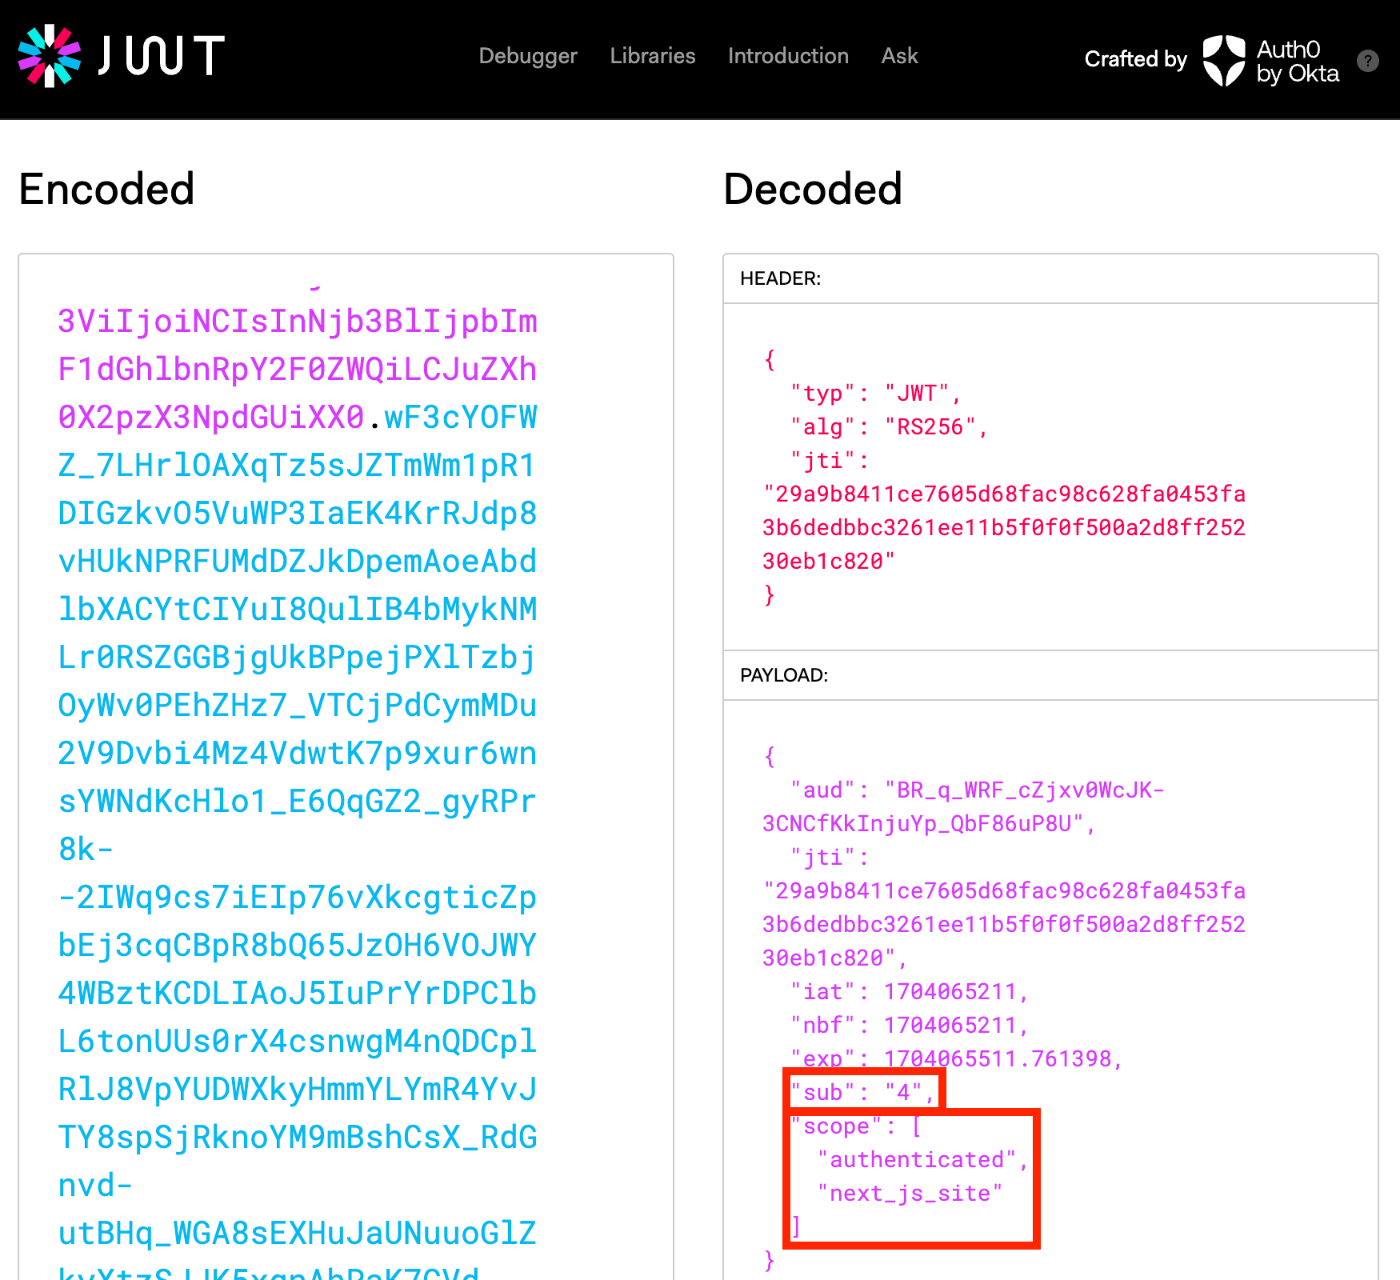
As a result, the following JSON data can be obtained.
When verifying the above access_token with jwt.io, it can be confirmed that the User ID is 4, and the scope is set to “authenticated user” and the previously specified “Next.js Site.”
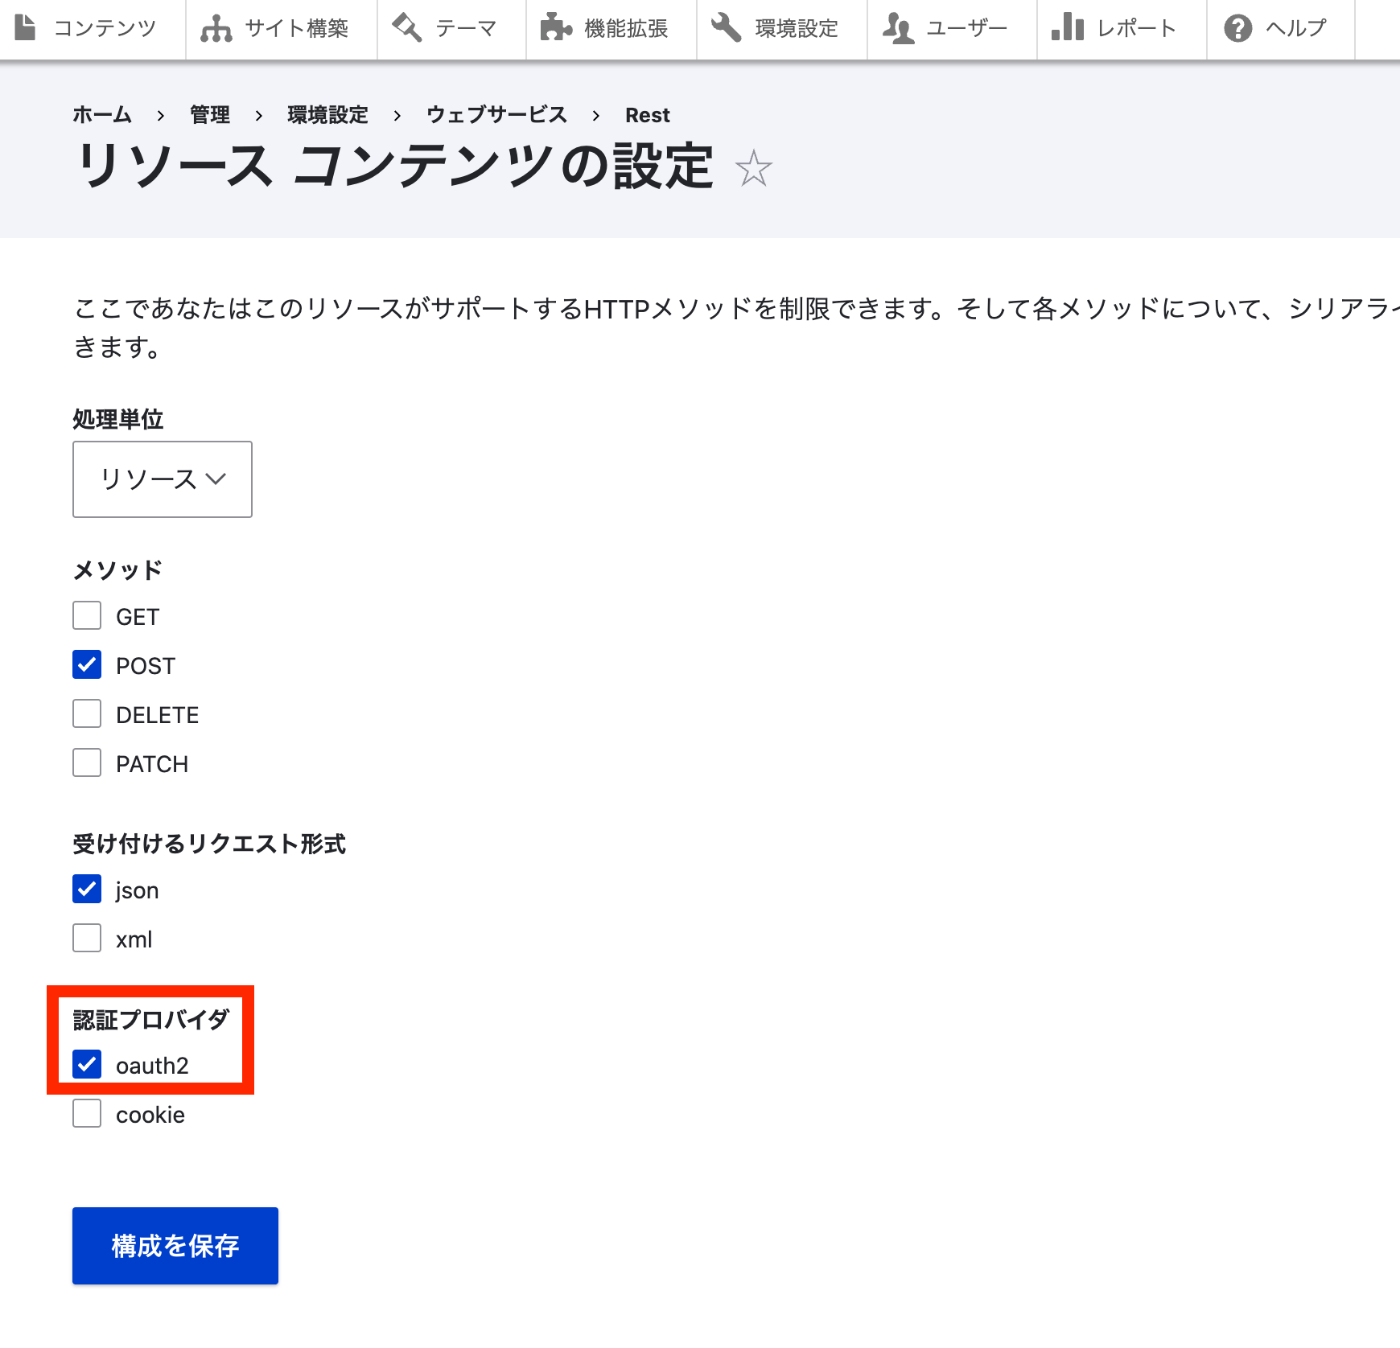
Trying OAuth2 Authentication with Drupal’s REST UI
Drupal Configuration
For how to use Postman, please also refer to the following article.
Access /admin/config/services/rest/resource/entity%3Anode/edit and select “oauth2” as the authentication provider.
Postman Operations (JSON:API)
Try sending a POST request as follows.
{path where DRUPAL is installed}/jsonapi/node/article
At this time, select Bearer Token in Authorization and enter the token obtained earlier.
As a result, the content was added correctly.
When the token has expired, the following “Unauthorized” result was returned.
Postman Operations (Non-JSON:API)
On the other hand, when requesting {path where DRUPAL is installed}/node?_format=json, the following result was returned.
Since it worked when using the JSON Web Token Authentication module, there may be an error somewhere in the configuration. I would like to continue investigating.
Summary
I introduced a usage example of the simple_oauth module. There may be some errors, but we hope this serves as a useful reference.