Overview
Bulk Import is a module for batch registration of items and media in Omeka S.
https://github.com/Daniel-KM/Omeka-S-module-BulkImport
It has been continuously updated and has become quite convenient, so this is a memo.
Installation
It can be installed in the usual way. However, the Log module must be installed beforehand.
https://github.com/Daniel-KM/Omeka-S-module-Log
Usage
Here, I will introduce an example of registration using a CSV file.
Configuration
First, access the following and click the edit icon.
/admin/bulk/importer

For the “Mapper” item in the “Importer” tab, select “Manual.” This enables manual mapping between CSV column names and Omeka S fields.

Next, move to the “Processor” tab. The settings here can also be changed later (after uploading the CSV file), but setting default values here helps prevent mistakes and omissions, making the process more efficient.
As a configuration example, set “Action” to “Revise data of resources.” This enables partial updates (PATCH). Specifically, if there are Omeka S fields not present as columns in the CSV, those field values in Omeka S will be preserved, and only the Omeka S fields corresponding to columns in the CSV will be updated, making this a relatively safe update method.

Additionally, setting “Action on unidentified resources” to “Create a new resource” means that existing resources will be updated, and new ones will be created if they don’t exist. The criterion for determining whether an existing resource exists is set through “Identifier to use for linked resources or update.” For example, if you assign an identifier using dcterms:identifier, the existence of an existing resource is checked based on that value.
Also, setting “Visibility” to “Private” means that newly registered resources will be set to private, and you can later switch individual items between public and private.

Import
Access the following and click “CSV - Items.” (When registering other resource types such as Media, select the appropriate type.)
/admin/bulk/bulk-import

Step 2/4: Mapper
After uploading the CSV file on the next screen, you will navigate to the “Step 2/4: Mapper” screen. Here, you map the CSV file columns to Omeka S fields.
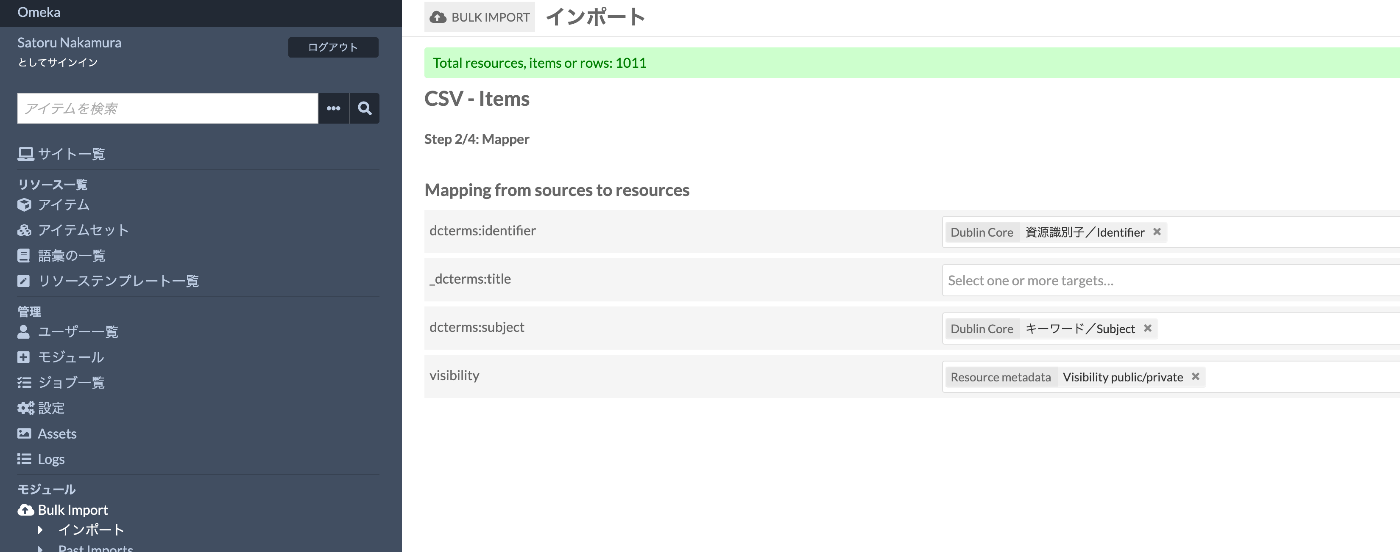
In the above, some reserved words like visibility are used. These can be confirmed in the following file.
For example, the following configuration shows that visibility or public maps to Omeka S’s o:is_public.
For columns that do not match the above rules, you can manually map them to Omeka S fields.
Step 3/4: Processor
In the next “Step 3/4: Processor,” the default values set earlier are reflected. Update any sections that need to be overridden as appropriate.

On the next screen, the actual registration of the CSV file data begins.
Summary
Through ongoing updates, the module’s usability has improved with pre-configuration screens and step-by-step navigation. Since it offers a rich set of features, registration and configuration with formats other than CSV is also possible, and I hope to introduce those usage methods in the future.
I hope this is helpful when using Omeka S.